How to Sight In Rifle Scope at 25 Yards Step-by-Step Guide for Accurate Zeroing
A properly sighted rifle scope is essential for improving accuracy and building confidence at the range. Whether you are preparing for hunting, target shooting, or simply testing a new optic, taking the time to zero your scope helps ensure your shots land where you intend. Starting at a shorter distance also makes the adjustment process more efficient.
Many shooters search for how to sight in rifle scope at 25 yards because it provides a practical starting point for aligning the scope before moving to longer distances. This method helps reduce large point-of-impact errors and makes fine-tuning much easier during the zeroing process.
A careful setup, consistent shooting position, and precise scope adjustments all contribute to better results. Using the correct target and making measured corrections allows you to achieve a reliable zero with fewer rounds.
This guide explains how to sight in rifle scope at 25 yards, covering the equipment you need, the zeroing process, common mistakes to avoid, and useful tips for improving overall shooting accuracy.
Why A 25-Yard Zero Is Commonly Used
A 25-yard zero is one of the most popular starting points for sighting in a rifle scope because it allows shooters to make accurate adjustments at a short, manageable distance. This approach helps align the scope with the rifle before moving to longer ranges for fine-tuning. It saves ammunition, reduces frustration, and provides a solid foundation for achieving a dependable zero.
Easier To Get Shots On Target
One of the main reasons shooters begin at 25 yards is that it is much easier to place shots on the target. At shorter distances, even a rifle scope that is significantly out of alignment is more likely to keep rounds on the paper, making it easier to identify the point of impact and make the necessary scope adjustments.
This approach is especially helpful when mounting a new scope or reinstalling an optic after maintenance. Instead of searching for missed shots at longer distances, you can quickly observe your group, adjust the windage and elevation turrets, and continue the zeroing process with greater confidence.
Starting at 25 yards also reduces wasted ammunition because corrections are easier to measure and verify after each group of shots.
Saves Time And Ammunition
Zeroing a rifle at shorter distances often requires fewer adjustments than starting immediately at 100 yards. Since impacts are easier to locate, you spend less time searching for missed shots and more time making meaningful corrections that bring the group closer to the desired point of aim.
Using fewer rounds during the initial sight-in process can also reduce ammunition costs, particularly for centerfire rifle calibers. This makes a 25-yard zero an economical choice for shooters who regularly mount new optics or test different rifles.
Once the rifle is properly aligned at 25 yards, only minor adjustments are typically needed when confirming the final zero at longer distances.
Provides A Reliable Starting Point
A 25-yard zero is not always intended to be the final zero for every rifle, but it serves as an excellent reference point before confirming accuracy farther downrange. Establishing this initial alignment helps ensure that later adjustments at 50 or 100 yards are smaller and more precise.
Many experienced shooters use this method because it simplifies the overall sight-in process. Rather than making large corrections at extended distances, they refine an already well-aligned optic, resulting in greater consistency and improved confidence.
This step-by-step approach also helps identify potential issues with scope mounting, loose rings, or inconsistent shooting technique before moving to longer-range testing.
Suitable For Many Shooting Applications
The 25-yard zero is widely used for a variety of shooting activities, including recreational target practice, hunting preparation, and firearm setup after installing a new scope. Its flexibility makes it useful for shooters with different experience levels and a wide range of rifle platforms.
Many shooting ranges include 25-yard lanes, making this distance convenient and accessible. Beginners appreciate the simplicity of making visible adjustments, while experienced shooters value the efficiency it brings to the zeroing process before verifying accuracy at greater distances.
Although the final zero distance depends on the rifle, ammunition, and intended use, beginning at 25 yards remains a practical and widely accepted method for establishing a solid baseline.
Equipment You Need Before Zeroing
Preparing the right equipment before zeroing a rifle scope helps create a smoother and more accurate sight-in process. Using proper tools minimizes unnecessary adjustments, improves shooting consistency, and reduces wasted ammunition. Having everything organized before arriving at the range allows you to focus on making precise corrections instead of searching for missing gear between shooting groups.
A Properly Mounted Rifle And Scope
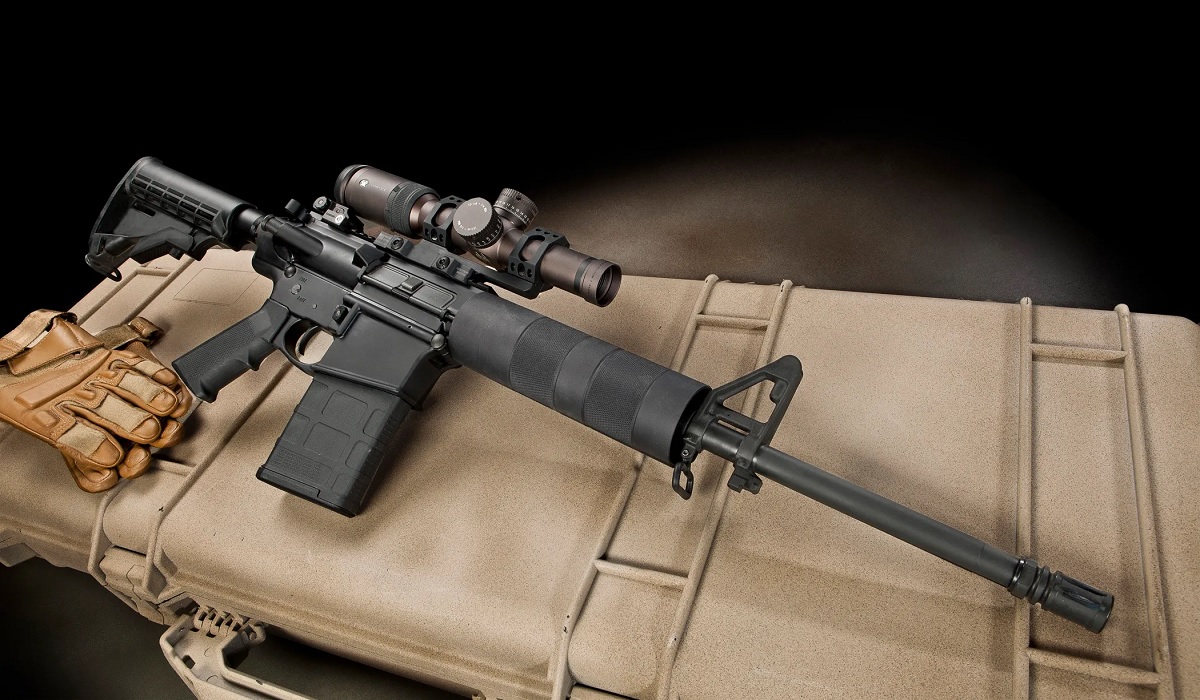
The most important piece of equipment is a rifle with a securely mounted scope. Before heading to the range, check that the scope bases, rings, and mounting screws are tightened according to the manufacturer’s recommended torque specifications. A loose scope can shift during recoil, making it impossible to achieve a consistent zero.
Inspect the scope to ensure the reticle appears clear and the magnification and focus controls operate smoothly. Verify that the eye relief is comfortable and that the optic is positioned correctly for a full field of view. Taking a few minutes to confirm everything is secure helps prevent unnecessary troubleshooting later.
A stable mounting system provides the foundation for accurate adjustments and consistent shot placement throughout the zeroing session.
Stable Shooting Support Improves Accuracy
A stable shooting position is essential for producing tight shot groups and making reliable scope adjustments. Most shooters use a shooting bench along with a front rest, bipod, or sandbags to support the rifle and minimize unnecessary movement during each shot.
Supporting both the front and rear of the rifle helps maintain consistent alignment with the target. Reducing shooter movement allows you to evaluate the rifle’s performance more accurately rather than introducing avoidable human error into each group.
Comfort also matters during extended range sessions. A steady shooting position reduces fatigue and helps maintain consistent technique from the first shot to the final adjustment.
Use The Right Target And Ammunition
Selecting an appropriate sight-in target makes it easier to identify bullet impacts and calculate scope adjustments. High-contrast targets with clearly marked aiming points allow you to measure group placement more accurately, especially at 25 yards where small adjustments can produce noticeable changes.
Use the same ammunition you intend to shoot regularly after zeroing the rifle. Different bullet weights, velocities, and manufacturers can produce different points of impact, making it difficult to maintain a reliable zero when switching between loads.
Keeping your ammunition consistent throughout the sight-in process ensures that each adjustment reflects the actual performance of your chosen load.
Bring Essential Range Tools And Safety Gear
A successful zeroing session also requires several basic tools and safety items. Eye and hearing protection are essential for every trip to the range, while a screwdriver or adjustment tool may be needed for scope turrets or mounting hardware. Bringing extra ammunition allows you to confirm adjustments without ending the session early.
Many shooters also carry a spotting scope or binoculars to inspect bullet impacts without repeatedly walking downrange. A notebook or shooting log can help record adjustments, ammunition details, and environmental conditions for future reference.
Having the proper equipment readily available makes the zeroing process more organized, efficient, and consistent while helping you achieve accurate and repeatable results.
Preparing Your Rifle And Scope
Proper preparation is an important part of achieving an accurate rifle scope zero. Before firing the first shot, take time to inspect your rifle, confirm the scope is securely mounted, and verify that all components are functioning correctly. A careful setup reduces unnecessary adjustments at the range and helps produce more consistent results throughout the zeroing process.
Inspect The Scope Mount And Hardware
Begin by checking the scope bases, rings, and mounting screws to ensure everything is secure. Loose hardware can allow the scope to shift under recoil, causing inconsistent shot placement and making accurate zeroing nearly impossible. Tightening components to the manufacturer’s recommended torque specifications helps maintain stability.
Visually inspect the scope for signs of damage, uneven mounting, or gaps between the rings and the optic. Confirm that the scope sits level with the rifle and that the reticle is properly aligned. Taking a few minutes to inspect the mounting system helps prevent avoidable problems during the sight-in session.
A properly secured scope creates a stable platform for accurate adjustments and dependable performance over repeated shots.
Adjust Eye Relief And Reticle Focus
Comfort and visibility play a major role in accurate shooting. Position the scope so you have a full, clear sight picture while maintaining a comfortable shooting position. Proper eye relief helps reduce strain and supports consistent head placement behind the optic.
Next, adjust the reticle focus so the crosshairs appear sharp and easy to see. A clearly defined reticle makes precise aiming easier, especially when making small corrections during the zeroing process. Once adjusted, avoid changing these settings unnecessarily throughout the session.
Consistent eye position and a clear reticle improve repeatability and help eliminate variables that could affect shot placement.
Bore Sight Before Firing Live Rounds
Bore sighting is a useful step that helps align the scope with the rifle before firing at the target. Whether performed with a laser bore sighter or by visually looking through the barrel on an unloaded rifle, this process places the initial point of impact much closer to the point of aim.
Starting with a bore-sighted rifle often reduces the number of adjustments needed during live fire. It also increases the likelihood that your first shots will land on the target, saving both time and ammunition during the zeroing process.
Although bore sighting does not replace live-fire zeroing, it provides an efficient starting point for making accurate scope adjustments.
Check Rifle Function And Ammunition
Before beginning the sight-in process, inspect the rifle to ensure it is clean, properly lubricated, and operating correctly. Verify that the action cycles smoothly and that the barrel is free from obstructions or excessive fouling. A well-maintained rifle contributes to more consistent accuracy and dependable performance.
Use the same ammunition throughout the entire zeroing session because different bullet weights and loads can produce different points of impact. Consistency in ammunition allows your scope adjustments to reflect the rifle’s actual performance rather than changes caused by switching loads.
Completing these final checks before heading to the firing line helps create a smoother zeroing session and increases the likelihood of achieving a precise and repeatable zero.
Setting Up A Safe And Consistent Shooting Position
A stable shooting position is one of the most important factors in accurately zeroing a rifle scope. Consistency allows you to evaluate the rifle and scope rather than variations in your shooting technique. By creating a solid, repeatable position and following established range safety practices, you can produce tighter shot groups and make more precise scope adjustments.
Choose A Stable Shooting Bench Or Rest
Begin by selecting a sturdy shooting bench or another stable firing position provided by the range. A solid surface minimizes unnecessary movement and gives you a dependable platform for supporting the rifle during each shot. Stability is especially important when making small adjustments while zeroing at 25 yards.
Use a front rest, bipod, or sandbags to support the fore-end of the rifle. Adding a rear shooting bag beneath the stock helps keep the rifle level and reduces unwanted movement during aiming. Proper support allows the rifle to remain steady while you concentrate on trigger control and sight alignment.
A consistent setup also makes it easier to compare shot groups after each scope adjustment because the rifle is supported in the same way every time.
Maintain Proper Body Position And Grip
Position your body comfortably behind the rifle so you can maintain the same posture throughout the shooting session. Your shoulders should remain relaxed, and your head should naturally align with the scope without excessive stretching or leaning. Consistent body alignment improves both comfort and repeatability.
Hold the rifle with a firm but controlled grip that does not introduce unnecessary pressure into the stock. Excessive muscle tension can shift the rifle slightly before or during the shot, affecting accuracy. Keeping your support hand and shooting hand in consistent positions helps produce more reliable results.
Repeating the same body position for every shot allows you to evaluate the rifle’s performance with greater confidence and reduces shooter-related variables.
Focus On Trigger Control And Follow-Through
Smooth trigger control is essential for maintaining accuracy during the zeroing process. Press the trigger straight to the rear using steady, even pressure rather than jerking or anticipating recoil. A controlled trigger press helps prevent the rifle from moving off target just before the shot breaks.
Continue looking through the scope after firing instead of immediately lifting your head. This follow-through technique allows you to observe the rifle’s movement and maintain consistent shooting habits from one shot to the next.
Developing disciplined trigger control and follow-through improves group consistency and makes scope adjustments more meaningful because each shot better reflects the rifle’s actual point of impact.
Follow Essential Range Safety Practices
Safety should remain the highest priority throughout every zeroing session. Always keep the rifle pointed in a safe direction, follow the range officer’s instructions, and ensure the firearm remains unloaded until you are ready to shoot. Wearing appropriate eye and hearing protection helps protect you from common range hazards.
Before going downrange to inspect or replace targets, verify that the firing line has been declared safe and that all firearms are unloaded according to range procedures. Remaining aware of your surroundings and following established safety rules creates a safer environment for everyone at the range.
Combining safe firearm handling with a consistent shooting position allows you to focus on accuracy while promoting responsible and disciplined shooting practices.
Making Scope Adjustments Effectively
Making accurate scope adjustments is a key part of the zeroing process. Instead of reacting to every individual shot, use consistent shooting groups to determine the correct windage and elevation changes. Careful adjustments, combined with patience and a methodical approach, help you achieve a precise zero while reducing unnecessary ammunition use and repeated corrections.
Shoot Consistent Groups Before Adjusting
Rather than adjusting the scope after every shot, fire a three-shot or five-shot group from a stable shooting position. A group provides a more accurate representation of the rifle’s point of impact because it reduces the influence of minor shooting errors that can occur with a single round.
After completing the group, identify its center instead of focusing on the farthest shot. Measuring the average impact point allows you to make more accurate windage and elevation adjustments. This approach improves consistency and prevents overcorrecting the scope based on isolated shots.
Repeating the same process after each adjustment helps verify that your changes are producing the desired results before moving on to the next correction.
Understand Windage And Elevation Turrets
Most rifle scopes use two adjustment turrets to move the point of impact. The elevation turret controls vertical movement, while the windage turret controls horizontal movement. Each click represents a specific amount of adjustment, commonly measured in minutes of angle (MOA) or milliradians (MRAD), depending on the scope model.
Before making adjustments, review your scope’s manual to understand how much each click changes the point of impact at your chosen distance. Knowing the adjustment value allows you to calculate corrections more accurately and avoid unnecessary trial and error.
Turning the correct turret in the proper direction ensures your next shot group moves closer to the intended point of aim.
Make Small And Measured Corrections
Large adjustments often create unnecessary confusion during the zeroing process. Instead, make only the number of clicks needed to correct the measured difference between the center of your shot group and the target’s aiming point. Controlled adjustments produce more predictable results and simplify the sight-in process.
After each correction, fire another group from the same stable position before making additional changes. This step confirms whether the adjustment achieved the desired result or whether a minor refinement is still needed.
Working in small increments helps maintain consistency and reduces the likelihood of overshooting the correct zero with excessive scope adjustments.
Verify The Zero Before Finishing
Once your shot groups consistently strike the intended point of aim at 25 yards, spend time confirming the zero rather than ending the session immediately. Fire several additional groups under the same conditions to verify that the rifle, scope, and ammunition continue to produce consistent results.
Many shooters also confirm their zero at longer distances, such as 50 or 100 yards, depending on the rifle’s intended use. This additional verification helps ensure that the initial 25-yard zero serves as an accurate foundation for the final sight-in distance.
Taking the time to verify your adjustments improves confidence in your equipment and helps ensure dependable accuracy during future range sessions or hunting trips.
Verifying Accuracy After Adjustments
Once you have made your scope adjustments, the next step is to verify that the rifle consistently shoots where you intend. Accuracy verification confirms that your changes were successful and helps identify any remaining corrections before considering the rifle properly zeroed. Taking the time to confirm your results builds confidence and ensures more dependable performance during future shooting sessions.
Fire Multiple Shot Groups
The best way to verify your adjustments is by shooting several three-shot or five-shot groups from the same stable position. Multiple groups provide a clearer picture of the rifle’s overall accuracy than a single group because they reduce the influence of occasional shooter error or minor variations between individual shots.
After each group, compare the center of the impacts with your aiming point. Consistent group placement indicates that your scope adjustments are correct and that the rifle is maintaining its zero. Recording each group’s location can also help track your progress throughout the sight-in session.
Repeating this process allows you to confirm that the rifle performs consistently instead of relying on a single successful group.
Confirm Consistency With The Same Ammunition
Accuracy verification should always be completed using the same ammunition that was used during the zeroing process. Different bullet weights, manufacturers, and velocities can shift the point of impact, making it difficult to determine whether changes are caused by the ammunition or the scope adjustments.
Using a single ammunition type throughout the session provides reliable results and allows you to evaluate the rifle’s actual performance. Once the zero has been confirmed, you can test other loads later and make separate adjustments as needed.
Maintaining ammunition consistency helps eliminate unnecessary variables and supports a more dependable final zero.
Check The Zero At Longer Distances
Although a 25-yard zero provides an excellent starting point, many shooters verify their rifle’s performance at greater distances after completing the initial adjustments. Depending on the intended use of the rifle, confirming the zero at 50 or 100 yards helps ensure that the scope aligns with your long-range shooting goals.
Longer-distance verification also reveals whether additional fine adjustments are necessary. Small corrections made after extending the distance often improve overall accuracy while preserving the solid foundation established during the initial sight-in process.
This step increases confidence that the rifle will perform as expected in real shooting situations.
Inspect Your Equipment Before Finishing
Before ending the range session, inspect your rifle and scope to ensure everything remains secure after repeated firing. Check the scope rings, mounting screws, and bases for any signs of movement, as recoil can occasionally loosen hardware over time.
Also verify that the optic remains clear and that the adjustment turrets have not shifted unintentionally. Taking a few minutes to inspect your equipment helps prevent future accuracy issues and confirms that your zero remains reliable for your next trip to the range or your next hunting outing.
Frequently Asked Questions
How To Sight In Rifle Scope At 25 Yards?
To sight in your rifle scope at 25 yards, begin with a securely mounted scope, a stable shooting rest, and the ammunition you plan to use regularly. Fire a three-shot group, locate the center of the group, and adjust the windage and elevation turrets according to your scope’s adjustment values.
Repeat the process until your shot groups consistently strike the desired point of impact. Once you achieve a reliable 25-yard zero, confirm your accuracy at longer distances, such as 50 or 100 yards, based on your intended shooting application.
Why Do Shooters Start Zeroing At 25 Yards?
Many shooters start at 25 yards because it is easier to keep shots on the target and identify the point of impact. A shorter distance allows you to make larger corrections with fewer rounds while reducing the chance of completely missing the target during the initial sight-in process.
You also save time and ammunition because adjustments are easier to verify at close range. After establishing a dependable starting zero, you can refine your scope at greater distances to match your preferred hunting or target-shooting setup.
How Many Shots Should You Fire Before Adjusting The Scope?
You should normally fire a three-shot or five-shot group before making any scope adjustments. A group provides a more accurate representation of the rifle’s true point of impact than a single shot, which may be affected by minor shooter error or environmental conditions.
After locating the center of the group, make only the necessary windage and elevation corrections. Shooting another group after each adjustment helps confirm that the changes are working as expected and prevents unnecessary overcorrection during the zeroing process.
Should You Bore Sight Before Zeroing A Rifle Scope?
Yes, bore sighting is a helpful first step before firing live ammunition. Bore sighting aligns the scope with the rifle well enough to increase the likelihood that your first shots will land on the target, reducing wasted ammunition and saving time during the sight-in session.
You should remember that bore sighting does not replace live-fire zeroing. Final adjustments must always be made by shooting actual groups at the range to ensure the rifle and scope are accurately aligned under normal firing conditions.
Can Different Ammunition Affect Your Scope Zero?
Yes, different ammunition can significantly change your rifle’s point of impact. Variations in bullet weight, velocity, manufacturer, and bullet design may produce different shot placement, even when fired from the same rifle with the same scope settings.
You should use the same ammunition throughout the zeroing process and continue using that load whenever possible. Switching to another type of ammunition may require additional scope adjustments to maintain the same level of accuracy and consistency.
How Do You Know Your Rifle Scope Is Properly Zeroed?
Your rifle scope is properly zeroed when multiple shot groups consistently strike the intended point of aim from a stable shooting position. Consistent grouping is more important than a single accurate shot because it demonstrates repeatable performance.
You should also verify the zero at the distance you plan to shoot most often. Confirming your accuracy under the same conditions and with the same ammunition increases confidence that the rifle will perform reliably during hunting or target shooting.
What Mistakes Should You Avoid When Zeroing A Rifle Scope?
Several common mistakes can make zeroing more difficult, including using loose scope mounts, changing ammunition during the process, adjusting the scope after every shot, and shooting without adequate support. These errors often lead to inconsistent groups and unnecessary frustration.
You should also avoid rushing through the sight-in process. Taking your time, firing consistent shot groups, checking your equipment regularly, and making measured adjustments will help you achieve a more accurate and dependable rifle scope zero.
Final Words
Achieving a precise scope zero takes patience, consistency, and attention to detail. Using the correct equipment, maintaining a stable shooting position, and making careful adjustments will help you improve accuracy while reducing unnecessary ammunition use. Understanding how to sight in rifle scope at 25 yards gives you a solid foundation before confirming your zero at longer distances.
Consistency is the key to reliable results. Always use the same ammunition, inspect your scope mounts regularly, and verify your zero after transporting your rifle or making any equipment changes. These simple habits help maintain dependable accuracy over time.
If you are learning how to sight in rifle scope at 25 yards, focus on making small, measured adjustments and confirming your results with consistent shot groups. With proper technique and regular practice, you can build confidence in your rifle setup and enjoy more accurate performance whenever you head to the range or field.