How to Sight In a Red Dot on a Shotgun – Step-by-Step Guide for Better Accuracy
Getting accurate shots with a shotgun becomes much easier when your red dot sight is properly adjusted. A correctly sighted optic helps you stay on target, improves consistency, and builds confidence whether you’re hunting, shooting at the range, or preparing for competition. Taking the time to set everything up the right way makes a noticeable difference in performance.
Many shooters wonder how to sight in a red dot on a shotgun because the process looks more complicated than it really is. With the right distance, steady shooting position, and a few careful adjustments, you can dial in your optic without unnecessary frustration.
Every shotgun and red dot combination performs a little differently, so a simple and methodical approach delivers the best results. Small adjustments followed by careful testing help you achieve reliable accuracy.
This guide explains how to sight in a red dot on a shotgun step by step, covering the essential techniques, recommended zeroing distances, and practical tips that help you get the most from your setup.
Choose the Right Distance to Sight In Your Shotgun
Selecting the correct sight-in distance plays a major role in achieving reliable accuracy with your shotgun. The ideal range depends on your intended use, including hunting, target shooting, or home defense. A practical zero ensures your red dot aligns with your point of impact, helping you make consistent and confident shots without unnecessary adjustments in the field.
Consider Your Primary Shooting Purpose
The best sight-in distance starts with understanding how you plan to use your shotgun. Hunters pursuing turkeys often choose a different zero than someone shooting slugs at paper targets or using a shotgun for defensive purposes. Matching your zero to your most common shooting scenario helps improve consistency and reduces the need for holdover or guesswork.
For bird hunting, many shooters focus on pattern testing rather than a traditional zero because shots are typically taken with moving targets. Slug shooters, on the other hand, benefit from a carefully established zero that provides dependable accuracy at longer ranges. Choosing a distance that reflects your real-world use creates a more practical setup.
A clear purpose also makes ammunition selection easier. Different loads perform differently, and the same shotgun can produce varying points of impact depending on the shell you use. Sighting in with the exact ammunition you plan to carry provides the most dependable results.
Common Sight-In Distances for Different Loads
Shotguns are versatile firearms, so there is no single sight-in distance that works for every setup. Many shooters begin with a 25-yard zero because it allows easy adjustments while keeping shots clearly visible on the target. Once the optic is aligned, they move to longer distances for final confirmation.
For slug shooting, 50 yards remains one of the most popular zeroing distances. It offers a good balance between close-range accuracy and dependable performance at moderate distances. Some shooters extend testing to 75 or even 100 yards, especially when using rifled barrels designed for slug ammunition.
Buckshot loads behave differently because the pellets spread as distance increases. Rather than focusing on a single bullet impact, shooters evaluate the entire pattern. Testing at realistic engagement distances helps determine where the center of the pattern lands in relation to the red dot.
Test and Confirm Your Zero at Multiple Ranges
Establishing a zero at one distance is only part of the process. After making adjustments, shoot additional groups at several distances to understand how your shotgun performs across different ranges. This provides a better understanding of trajectory and pattern placement while increasing confidence during actual use.
Keeping detailed notes during testing can be extremely helpful. Record the ammunition type, distance, weather conditions, and group size after each shooting session. These records make future adjustments faster and help identify the most accurate load for your shotgun.
Consistency matters throughout the testing process. Shoot from a stable rest whenever possible and avoid changing ammunition during the same zeroing session. Careful testing at multiple distances produces a dependable sight picture and reduces surprises when accuracy matters most.
Gather Everything Before Sighting In
Preparing all of your equipment before heading to the range makes the sighting-in process smoother and more efficient. Having the right tools within reach helps you focus on making accurate adjustments instead of searching for missing items. A well-organized setup also reduces interruptions, saves ammunition, and allows you to make consistent progress while zeroing your red dot.
Bring the Right Equipment and Tools
Start by packing every item needed for a successful sight-in session. Your shotgun, mounted red dot sight, appropriate ammunition, paper targets, target stand, eye and ear protection, and the adjustment tool for your optic should all be included. Many red dot sights require a small screwdriver or a specific adjustment wrench, so checking your owner’s manual before leaving home prevents unnecessary delays.
A sturdy shooting rest or sandbags are equally important because they minimize movement and help produce consistent shot groups. Stable support allows you to evaluate the sight rather than your shooting position. Bringing extra batteries for the red dot is also a smart precaution, especially during longer range sessions where power loss could interrupt the process.
Simple accessories can improve efficiency as well. A stapler or tape for attaching fresh targets, a marker for labeling shot groups, and a notebook for recording adjustments make it easier to track progress throughout the sighting session. Staying organized helps prevent confusion after multiple rounds have been fired.
Choose the Correct Ammunition Before Zeroing
Using the same ammunition throughout the sight-in process is one of the most important factors in achieving reliable results. Different brands, shot sizes, slug weights, and shell velocities can impact the point of impact. Switching ammunition while making adjustments often creates inconsistent groups and makes it difficult to determine whether the sight or the ammunition caused the change.
Select the exact load you intend to use after completing the zero. Hunters should sight in with their preferred hunting loads, while target shooters should use the ammunition planned for regular practice or competition. Matching the ammunition to its intended purpose produces more dependable accuracy under real shooting conditions.
Inspect each shell before loading to ensure it is clean and undamaged. Consistent ammunition quality contributes to consistent performance, making it easier to evaluate every adjustment made to the red dot. Keeping several boxes of the same load available also prevents interruptions during testing.
Prepare a Safe and Stable Shooting Setup
A safe shooting environment creates better conditions for accurate sighting. Position your target securely at the selected distance and verify that the shooting lane has a proper backstop. Good lighting helps you see both the target and the red dot clearly, making precise adjustments easier throughout the session.
Set up your shooting bench so you can maintain a comfortable and repeatable position behind the shotgun. A relaxed posture reduces unnecessary movement and helps produce tighter shot groups. Place all tools, ammunition, and accessories within easy reach to avoid leaving your shooting position repeatedly.
Before firing the first shot, confirm that the red dot mount remains firmly secured and all screws are properly tightened. A loose optic can shift during recoil, leading to inaccurate results and unnecessary adjustments. Taking a few minutes to verify your equipment before shooting helps create a smoother and more productive sight-in session.
Mount the Red Dot Securely
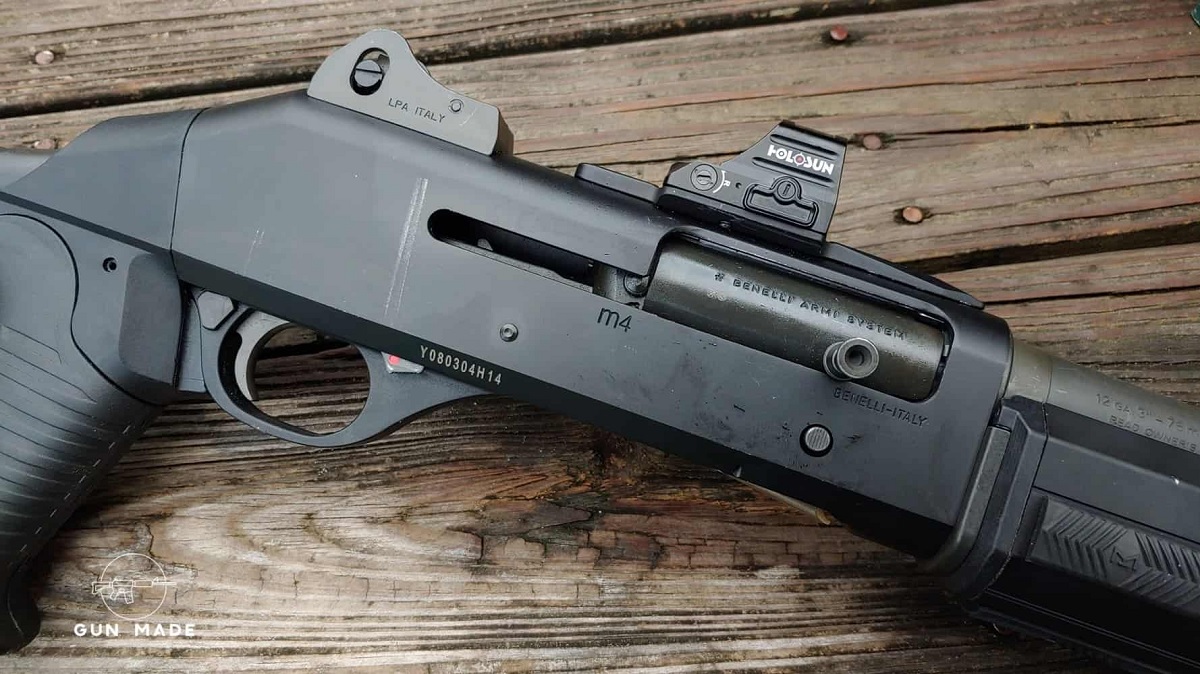
A properly mounted red dot provides the foundation for accurate and consistent shooting. Even the best optic cannot maintain its zero when the mount shifts under recoil. Taking time to install the sight correctly helps prevent movement, protects the optic from unnecessary stress, and ensures every adjustment made during the sighting process remains reliable.
Install the Mount According to the Manufacturer’s Instructions
Begin by verifying that your shotgun is unloaded before installing the red dot. Carefully attach the mounting base to the receiver or compatible rail, following the manufacturer’s recommended procedure. Each mounting system has specific installation requirements, so using the correct sequence helps ensure the optic sits evenly and securely without creating unnecessary pressure on the mount.
Place the red dot onto the mounting base and align it properly before tightening the screws. Tighten each screw gradually in an alternating pattern instead of fully securing one side at a time. This method applies even pressure across the mount and helps maintain proper alignment throughout the installation process.
Use the recommended torque specifications whenever possible. Over-tightening can damage screws, strip threads, or place stress on the optic, while under-tightening may allow movement during recoil. Following the manufacturer’s guidelines creates a secure installation that remains dependable over time.
Check Eye Position and Red Dot Alignment
After mounting the optic, shoulder the shotgun several times to confirm the red dot appears naturally in your field of view. The sight should allow a comfortable shooting position without forcing you to stretch your neck or adjust your cheek weld. A consistent head position improves target acquisition and helps maintain repeatable accuracy.
Adjust the optic’s position along the rail until it feels balanced and easy to use. The red dot should remain clearly visible while maintaining a natural shooting stance. Spending extra time on this step improves comfort during extended shooting sessions and supports faster target engagement.
Check the brightness setting while aiming at targets under the expected lighting conditions. The dot should remain easy to see without appearing overly bright or producing excessive glare. Proper brightness makes the aiming point more precise and reduces distraction during sighting.
Verify the Mount Before Firing
Inspect every mounting screw one final time before firing your first round. Confirm that the optic remains firmly attached and does not shift when gentle pressure is applied by hand. A quick inspection can identify loose hardware before recoil has an opportunity to affect the installation.
Fire a small group of shots and inspect the mount again afterward. Shotgun recoil places significant force on optics, making it important to confirm that nothing has loosened during the initial rounds. Detecting movement early prevents wasted ammunition and unnecessary sight adjustments.
Continue checking the mount periodically throughout the sight-in session, especially after several groups. A securely mounted red dot maintains its zero more effectively and provides consistent performance, allowing every adjustment to reflect the shotgun’s true point of impact rather than movement in the mounting system.
Set Up Your Target for Accurate Adjustments
Proper target placement is essential for making precise red dot adjustments on your shotgun. A clearly visible target positioned at the correct distance allows you to evaluate each shot accurately and make consistent corrections. Taking a few minutes to set up your target properly reduces guesswork, saves ammunition, and helps establish a dependable zero more efficiently.
Position the Target at the Intended Zero Distance
Place your target at the exact distance chosen for your sight-in session. Many shooters begin at 25 yards before confirming their zero at longer distances, while others start directly at 50 yards when using slug ammunition. Measuring the distance carefully rather than estimating it ensures your adjustments reflect real shooting conditions and produce more reliable results.
Secure the target firmly so it remains upright throughout the session. A target that shifts or falls after each shot interrupts the process and creates unnecessary delays. Position it against a safe backstop that clearly captures every round, allowing you to inspect shot placement without difficulty.
Good visibility is equally important. Choose a target location with adequate lighting so the aiming point remains easy to see through the red dot. Clear target visibility supports more precise aiming and helps reduce errors caused by poor sight alignment.
Use a Target With a Clear Aiming Point
Select a target that provides a bold and easy-to-identify center. High-contrast bullseye targets or targets with large geometric shapes work well because they help you maintain a consistent point of aim throughout every group. A clearly defined aiming point reduces eye strain and allows for more accurate evaluation of your shot placement.
Avoid cluttered targets filled with multiple aiming points during the initial sight-in process. Focusing on one clearly marked center prevents confusion and makes it easier to identify which shots belong to each group. Replacing the target after several groups also keeps the impact marks easy to distinguish.
Mark every completed shot group with a pen or marker before making adjustments. Labeling each group helps you compare results and monitor how the point of impact changes after every correction. Organized targets provide valuable information when fine-tuning your red dot.
Maintain a Consistent Shooting Position
Accurate target adjustments depend not only on the target itself but also on maintaining the same shooting position for every shot. Use a stable shooting bench with sandbags or a shooting rest to support the shotgun and reduce unnecessary movement. Consistency allows the red dot adjustments to reflect the shotgun’s performance rather than variations in your shooting technique.
Aim at the exact same point on the target for every round in a group. Changing your aiming point during testing makes it difficult to determine whether the adjustment or the shooter caused the difference in impact. Careful repetition produces more meaningful results and speeds up the sight-in process.
Take your time between shots instead of rushing through the session. Allow yourself to settle into a comfortable position, maintain a consistent cheek weld, and press the trigger smoothly. A controlled approach helps produce tighter groups, making each adjustment more accurate and easier to evaluate.
Fire the First Group
Your first group of shots provides the baseline for every adjustment you make afterward. The goal is not to achieve a perfect zero immediately but to see where your shotgun is impacting in relation to the red dot. Shooting a controlled group under consistent conditions gives you reliable information for making accurate sight corrections.
Shoot a Consistent Three- to Five-Shot Group
Load the shotgun with the same ammunition you selected for the entire sight-in session and settle into a stable shooting position. Fire three to five carefully aimed shots at the exact same point on the target. Using a consistent aiming point throughout the group makes it much easier to determine the true point of impact rather than judging individual shots.
Maintain a smooth trigger press and avoid rushing between shots. Allow the shotgun to return to a natural position after each round, then reacquire the target before firing again. A steady pace helps reduce shooter-induced errors and produces tighter, more consistent groups.
Focus on accuracy instead of speed during this stage. Every shot should be deliberate and controlled, allowing the group to represent the shotgun’s actual performance. A well-fired group provides dependable data for the next adjustment rather than creating uncertainty.
Keep Your Shooting Position the Same
Consistency behind the shotgun is just as important as the optic itself. Keep the same cheek weld, shoulder placement, and body position for every shot in the group. Small changes in head position or how the shotgun is supported can shift the point of impact and make the results difficult to interpret.
Use a shooting bench, sandbags, or a quality shooting rest to minimize movement. Supporting the shotgun reduces fatigue and allows you to concentrate on proper sight alignment and trigger control. Stable support also helps separate equipment performance from shooter error.
Take a comfortable position that you can repeat throughout the session. Avoid unnecessary movement after each shot, and continue aiming at the same target center. Repeating the same technique with every round improves the quality of the shot group and makes later adjustments more precise.
Examine the Shot Group Before Making Adjustments
After completing the first group, make the shotgun safe and walk to the target to inspect the results. Look at the overall group instead of focusing on individual holes. The center of the group shows where the shotgun is consistently hitting and provides the information needed to adjust the red dot correctly.
Measure how far the center of the group sits above, below, left, or right of your aiming point. Recording these measurements in a notebook helps you track every adjustment and compare future groups. Clear notes also make it easier to recognize progress as the zero becomes more refined.
Resist the urge to adjust the optic after every single shot. Reliable adjustments come from evaluating the entire group rather than isolated impacts. Once the first group has been carefully analyzed, you have a solid reference point for making precise corrections during the next stage of the sight-in process.
Adjust the Red Dot Sight
Once you have fired your first group, the next step is to adjust the red dot so the point of aim matches the point of impact. Careful, measured corrections produce better results than large adjustments. Taking your time during this stage helps you establish a precise zero while avoiding unnecessary ammunition and repeated corrections.
Read the Shot Group Before Making Changes
Begin by identifying the center of your shot group rather than focusing on individual holes. The center represents the average point of impact and provides the most accurate reference for adjusting your red dot. Compare this point with your intended aiming point to determine the direction and amount of correction needed.
Many red dot sights include adjustment turrets marked for elevation and windage. Elevation moves the point of impact up or down, while windage shifts it left or right. Understanding these controls before making adjustments prevents confusion and helps you apply corrections with confidence.
Take note of how far the group is from the target center. Measuring the distance allows you to make calculated adjustments instead of relying on guesswork. Accurate measurements save time and reduce the number of groups required to achieve a proper zero.
Make Small and Precise Adjustments
Adjust the red dot in small increments rather than making large changes all at once. Most optics move the point of impact by a specific amount for each click, making gradual corrections much easier to evaluate. Small adjustments help prevent overshooting the target center and keep the sighting process under control.
Use the adjustment tool recommended by the manufacturer and turn the elevation and windage turrets carefully. Pay close attention to the directional markings on the optic so every adjustment moves the point of impact in the intended direction. Following the markings eliminates unnecessary trial and error.
Record the number of clicks made after each adjustment. Keeping track of your changes provides a useful reference throughout the sight-in session and makes it easier to return to a previous setting whenever additional testing becomes necessary.
Fire Another Group to Verify the Adjustment
After completing the adjustments, fire another three- to five-shot group using the same ammunition, shooting position, and aiming point. Maintaining identical conditions ensures that any change in impact results from the optic adjustment rather than differences in shooting technique. Consistency is essential for evaluating the effectiveness of each correction.
Compare the new group with the previous one to determine how much the point of impact has shifted. Continue making small adjustments until the center of the group aligns with your desired point of aim. Repeating this process gradually produces a more accurate and dependable zero.
Avoid making multiple large corrections between groups. Careful evaluation after every adjustment creates a predictable sighting process and helps the red dot remain properly aligned for dependable performance during hunting, target shooting, or other intended applications.
Fire Another Group to Verify Changes
After adjusting the red dot sight, the next step is to confirm that the changes produced the desired results. Firing another controlled group allows you to evaluate the new point of impact under the same conditions as the previous shots. This verification process ensures your adjustments are accurate and helps you move closer to a dependable zero.
Repeat the Same Shooting Process
Use the same ammunition, target distance, and shooting position as you did during the first group. Consistency is critical because changing any part of the setup can affect the point of impact and make it difficult to judge whether the sight adjustment was successful. Keeping every variable the same provides a reliable comparison between shot groups.
Aim at the exact same point on the target and fire another three- to five-shot group with steady trigger control. Maintain a consistent cheek weld and body position throughout the sequence. Repeating the same technique helps eliminate unnecessary variables and allows the red dot adjustments to be evaluated accurately.
Avoid rushing through the group. Give yourself enough time to settle behind the shotgun before each shot, allowing the red dot to remain stable on the target. A calm and controlled approach produces tighter groups and more dependable results.
Compare the New Group With the Previous One
Once the second group is complete, inspect the target and compare the new impacts with the earlier group. Look for changes in the center of the group rather than focusing on individual shots. The overall movement shows how effectively the elevation and windage adjustments corrected the point of impact.
Measure the distance between the group center and your aiming point. Smaller deviations indicate that your adjustments are moving in the right direction. Recording these measurements helps track progress and provides a clear reference for any additional corrections that may still be required.
Pay attention to the group size as well as its location. A tight group demonstrates consistent shooting and confirms that the shotgun, ammunition, and optic are working together effectively. Wide or scattered groups may suggest the need to improve shooting stability before making further sight adjustments.
Continue Fine-Tuning Until the Zero Is Confirmed
Make additional adjustments only when the latest group clearly indicates they are needed. Use small corrections based on the measured point of impact rather than making large changes. Gradual refinement produces a more precise zero and reduces the likelihood of overcorrecting the optic.
Fire another verification group after each adjustment while maintaining identical shooting conditions. Repeating this cycle allows you to monitor progress and confirm that every change improves alignment between the red dot and the shotgun’s point of impact.
Continue the process until the center of each group consistently matches your intended aiming point. Verifying every adjustment with another carefully fired group creates confidence in the zero and ensures the red dot remains accurate for future range sessions, hunting trips, or other shooting activities.
FAQs
How Do You Sight In A Red Dot On A Shotgun?
You start by mounting the red dot securely and confirming that it is properly aligned with your shotgun. Gather the ammunition you plan to use regularly, place a target at your chosen zero distance, and fire a three- to five-shot group from a stable shooting position. This first group shows where your shotgun is hitting.
Next, adjust the windage and elevation based on the center of the shot group. Fire another group after each adjustment until your point of impact matches your point of aim. Taking small, measured steps helps you achieve a consistent and reliable zero.
What Is The Best Distance To Sight In A Red Dot On A Shotgun?
The best sight-in distance depends on how you plan to use your shotgun. Many shooters begin at 25 yards because it allows quick adjustments and easy observation of shot placement. Slug shooters often confirm their zero at 50 yards for dependable performance at moderate distances.
You should choose a distance that reflects your typical shooting conditions. Using the same distance you expect to shoot most often provides better real-world accuracy and helps you build confidence with your setup.
How Many Shots Should You Fire Before Adjusting The Red Dot?
You should fire a group of three to five shots before making any adjustments. A single shot does not provide enough information because small variations can occur during normal shooting. The center of a group gives you a much more accurate indication of where your shotgun is consistently hitting.
After examining the group, adjust the red dot according to the average point of impact. Continue firing groups after every adjustment until your shots consistently land where you are aiming.
Can You Sight In A Red Dot On A Shotgun Without A Shooting Rest?
You can sight in your shotgun without a shooting rest, but using one usually produces more consistent results. A stable shooting platform minimizes movement and helps you determine whether changes in impact come from the optic or your shooting technique.
Using sandbags or a shooting bench allows you to focus on proper trigger control and sight alignment. A steadier position generally leads to tighter shot groups and makes the sighting-in process faster and more accurate.
Should You Use The Same Ammunition While Sighting In?
Yes, you should use the same ammunition throughout the entire sight-in process. Different slug loads, buckshot loads, or shell brands can produce different points of impact. Changing ammunition while zeroing makes it difficult to determine whether the shift comes from the optic or the ammunition itself.
Once your shotgun is sighted in, continue using the same load whenever possible. Consistent ammunition helps maintain accuracy and ensures the red dot remains properly zeroed for your intended purpose.
How Often Should You Check Your Red Dot Zero?
You should check your zero regularly, especially after transporting your shotgun, replacing the battery, installing a new mount, or firing a large number of rounds. Heavy recoil can occasionally loosen mounting screws or shift the optic over time.
A quick confirmation at the range before hunting or an important shooting session gives you confidence that your red dot is still properly aligned. Regular verification helps maintain dependable accuracy and reduces the chance of unexpected changes in point of impact.
Why Is My Shotgun Still Shooting Off Target After Adjustments?
Several factors can cause your shotgun to remain off target even after making adjustments. Loose mounting screws, inconsistent shooting positions, incorrect adjustment directions, or changing ammunition during the process can all affect your results. Checking each of these areas helps identify the source of the problem.
You should also inspect your red dot mount for movement and confirm that the optic is securely attached. Careful testing with a stable shooting position and consistent ammunition usually resolves most zeroing issues.
Can You Use A Red Dot With Both Slugs And Buckshot?
Yes, you can use a red dot with both slugs and buckshot, but each load performs differently. Slugs produce a single point of impact, making them ideal for traditional sighting-in. Buckshot creates a pattern that spreads as distance increases, so you should test the pattern at realistic shooting distances.
You may notice different points of impact when switching between loads. Testing each type of ammunition separately allows you to understand its performance and make informed decisions about your preferred zero for different shooting applications.
Final Thoughts
Achieving a reliable zero takes patience, consistency, and the right shooting technique. Taking the time to make careful adjustments and confirm your results helps ensure your red dot performs accurately when it matters most. Learning how to sight in a red dot on a shotgun also builds confidence every time you head to the range or into the field.
Regularly checking your optic, mount, and chosen ammunition keeps your zero dependable over time. Small changes in equipment or ammunition can affect accuracy, so verifying your setup after any modification is always a smart practice. Staying consistent with your shooting position also improves repeatable results.
With the proper approach, how to sight in a red dot on a shotgun becomes a straightforward process rather than a difficult task. A well-zeroed red dot helps you shoot with greater precision, improves overall performance, and gives you confidence that your shotgun is ready whenever you need it.