How to Measure Sight Height – Easy Step-by-Step Guide for Accurate Results
Understanding the proper alignment of your firearm’s sights is an important part of improving accuracy and consistency. The relationship between the sights and the barrel can affect how your shots land, making sight height a key measurement for anyone adjusting or upgrading their setup.
Many shooters focus on optics, mounts, and adjustments but overlook the importance of getting the correct sight height. A small difference in height can change the point of impact and require additional corrections during aiming.
Learning how to measure sight height helps you understand the distance between the centerline of the bore and the centerline of your sights or optic. This measurement is useful when setting up new equipment, choosing mounts, or making precise adjustments.
With the right tools and a careful approach, measuring sight height can be a simple process. Knowing this measurement allows you to create a more reliable shooting setup and make better-informed decisions about your firearm accessories.
Gather The Tools You Need
Before starting the process, collecting the right tools makes measuring sight height easier and more accurate. Having proper measuring equipment helps you avoid guesswork and ensures you get reliable results. A careful setup allows you to check the distance between the firearm’s bore centerline and the sight or optic centerline without making unnecessary adjustments. Preparing everything beforehand also helps you complete the measurement smoothly.
Use A Reliable Measuring Tool
A precise measuring tool is essential when checking sight height because even small errors can affect your final calculation. A digital caliper is one of the most useful options because it provides accurate measurements and allows you to measure small distances with better control. A ruler with clear markings can also work for basic measurements, but it may not provide the same level of accuracy.
When using a measuring tool, make sure the markings are easy to read and the tool is in good condition. Dirt, damage, or worn markings can lead to incorrect readings. Take your time when placing the tool against the firearm components to avoid measuring from the wrong points.
You should measure from consistent reference points, such as the center of the barrel bore and the center of the sight or optic. Using the correct points ensures that the measurement represents the true sight height rather than just the outside dimensions of the firearm parts.
Keeping a notebook or digital record of your measurements can also be helpful. Recording the numbers allows you to compare different setups, especially when changing optics, mounts, or sight systems.
Prepare Your Firearm Setup
Before measuring sight height, make sure your firearm is properly prepared and placed in a stable position. A secure setup prevents movement during measurement and helps you get a more accurate reading. Place the firearm on a steady surface where you can easily access the barrel and sight system.
Remove any unnecessary accessories that may interfere with the measurement process. Items such as covers, attachments, or loose components can make it harder to identify the correct measuring points. A clear view of the sight and barrel area allows you to work more carefully.
Check that your sights or optic are installed correctly before taking measurements. A loose mount or improperly positioned sight can create inaccurate results. Confirm that all parts are tightened according to the manufacturer’s recommendations before measuring.
It is also useful to have proper lighting while working. Good visibility helps you locate the center points of the bore and sight more accurately. Taking extra care during preparation can prevent mistakes and make the entire measurement process more efficient.
Keep Reference Materials Available
Having reference information available can help you understand the measurements you collect. Manufacturer specifications, optic details, and mount information may provide useful details about expected sight heights. These references can help you compare your results and identify whether your setup matches your intended configuration.
Different firearms and sight systems can have different measurement requirements. Checking the specifications for your particular equipment helps you avoid using incorrect assumptions during the process. This is especially helpful when working with aftermarket sights or optics.
You may also want to keep a calculator nearby for any adjustments or comparisons. Some sight height calculations involve converting measurements or comparing different units. Having basic tools ready keeps the process organized.
A proper workspace with all necessary tools and information nearby makes measuring sight height more convenient. Preparation reduces interruptions and allows you to focus on collecting accurate measurements from your firearm setup.
Ensure The Firearm Is Safe Before Measuring
Safety should always come before taking any measurements on a firearm. Before checking sight height, creating a safe working environment helps prevent accidents and allows you to focus on getting accurate results. A careful preparation routine ensures the firearm is handled properly throughout the process. Taking a few moments to verify safety conditions makes the measurement procedure more controlled and organized.
Unload The Firearm Completely
Before beginning any measurement, make sure the firearm is completely unloaded. Remove the magazine or ammunition source and check that there is no round inside the chamber. Many safety mistakes happen when people assume a firearm is empty without physically confirming it, so a proper inspection is always necessary.
Open the action and visually inspect the chamber area to ensure no ammunition remains inside. Depending on the firearm type, you may also need to check the magazine well, cylinder, or loading area. This step creates a safer environment while you handle the firearm during the measurement process.
Keep all ammunition away from your workspace while measuring sight height. Separating ammunition from the firearm reduces distractions and prevents accidental loading. A clean workspace allows you to concentrate on measuring the correct points without unnecessary risks.
Always handle the firearm as though it could still contain ammunition until you have personally verified that it is empty. Maintaining this habit helps build responsible handling practices during any maintenance or adjustment task.
Place The Firearm In A Stable Position
A stable firearm position is important for both safety and measurement accuracy. Place the firearm on a secure surface where it will not shift, fall, or move while you are checking sight height. An unstable setup can create incorrect measurements and increase the chance of improper handling.
Use a suitable support system that keeps the firearm steady without damaging its finish or components. Avoid placing it in a position where pressure on the sights or optic could change their alignment. Keeping the firearm properly supported helps you measure from the correct reference points.
Make sure the area around the firearm is clear before starting. Remove unnecessary objects that may cause movement or interfere with your tools. A clean workspace provides better control and allows you to complete each step carefully.
Good lighting is also helpful when positioning the firearm. Clear visibility allows you to identify the barrel, sights, and other parts accurately. This makes it easier to perform measurements while maintaining safe handling practices.
Follow Proper Handling Practices
Even when measuring a firearm that has been unloaded, continue following proper handling habits. Always keep the muzzle pointed in a safe direction and avoid placing your hands near the trigger area unnecessarily. Responsible handling reduces risks during any firearm-related task.
Do not rush through the preparation process. Taking extra time to confirm the firearm’s condition and position helps prevent mistakes. Careful handling also makes it easier to focus on collecting accurate sight height measurements.
Avoid making adjustments or modifications while measuring unless you have confirmed the firearm is safe and you understand the procedure. Sudden changes to components can affect measurements and create unnecessary complications.
Maintaining safe habits throughout the process ensures you can measure sight height in a controlled and careful manner. A consistent safety routine supports accurate work and responsible firearm maintenance practices.
Identify The Measurement Points
Finding the correct measurement points is an important step when checking sight height because accuracy depends on measuring from the proper locations. The goal is to determine the distance between the centerline of the firearm’s bore and the centerline of the sight or optic. Understanding these reference points helps you collect consistent measurements and avoid incorrect calculations during the process.
Locate The Bore Centerline
The bore centerline is one of the most important reference points when measuring sight height. It represents the imaginary line that runs through the center of the firearm’s barrel. Since this point cannot always be seen directly, you need to identify it carefully based on the barrel design and available measurements.
To locate the bore centerline, examine the barrel opening and determine the center of the bore. The measurement should not be taken from the outside surface of the barrel because the outer dimensions do not represent the actual path of the projectile. Using the center point provides a more accurate reference for calculating sight height.
Different firearm designs may require slightly different approaches when identifying the bore centerline. Some barrels are easier to measure from the muzzle area, while others may require additional tools or reference information. Taking your time during this step helps prevent inaccurate results.
A clear understanding of the bore centerline allows you to compare the position of your sights or optic correctly. This measurement point serves as the foundation for determining how high the sight sits above the barrel.
Find The Sight Or Optic Centerline
The second important measurement point is the centerline of the sight or optic. This refers to the center point of the aiming system that your eye uses to align with the target. Identifying this point correctly ensures that the measurement reflects the actual height of your sight setup.
For iron sights, the centerline is usually determined by the center of the front and rear sight alignment. You need to measure from the appropriate height point rather than from the top edge of the sight. Small differences in measurement location can affect the final result.
For mounted optics, the centerline is typically found through the center of the optic tube or viewing window. The mount, rings, and optic design can all influence this height. Checking the specifications of your equipment may help confirm the correct reference point.
Accurately identifying the sight or optic centerline helps you understand the relationship between your aiming system and the barrel. This information is useful when adjusting your setup or comparing different sight configurations.
Measure The Distance Between Reference Points
Once both measurement points are identified, the next step is determining the distance between them. This distance represents the sight height and shows how far the sight or optic sits above the bore centerline. Using the correct reference points ensures the measurement reflects the true relationship between the two components.
When measuring, keep the tool positioned straight and avoid angles that could change the reading. A tilted measuring device may create a larger or smaller measurement than the actual distance. Careful placement improves consistency and reliability.
Take multiple measurements to confirm the result. Rechecking the distance can help identify mistakes caused by tool placement or unclear reference points. Recording each measurement allows you to compare results and select the most accurate value.
Understanding the relationship between these measurement points makes it easier to evaluate your firearm setup. Proper identification of the bore and sight centerlines provides the information needed for accurate sight height calculations.
How To Measure Sight Height With Iron Sights
Measuring sight height with iron sights requires careful attention to the relationship between the barrel and the aiming system. The process involves identifying the correct reference points and taking accurate measurements to understand how high the sights sit above the bore. Using the right method helps you collect reliable information for adjustments, comparisons, or future sight changes.
Prepare The Iron Sight Setup
Before measuring iron sight height, make sure the firearm is placed in a safe and stable position. Confirm that the firearm is unloaded and positioned on a secure surface where you can easily access both the barrel and sights. A steady setup reduces movement and helps you collect more accurate measurements.
Inspect the front and rear sights to ensure they are properly installed. Loose or damaged sights can affect the measurement and create inaccurate results. Check that the sights are aligned correctly before starting the process.
You will need a precise measuring tool, such as a digital caliper or another device capable of measuring small distances. Having clear visibility and proper lighting also makes it easier to identify the center points of the sight system.
Understanding the structure of your iron sights is important because different designs may have different measurement points. Fixed sights, adjustable sights, and different front sight profiles can slightly change how you determine the centerline.
Measure From The Bore Center To The Sight Center
The main goal when measuring iron sight height is finding the distance between the center of the bore and the center of the sight line. Start by identifying the bore centerline, which runs through the middle of the barrel. This point provides the base reference for your measurement.
Next, locate the center point of the iron sight. For most setups, the sight center is based on the point where the shooter aligns the front and rear sights during aiming. Measuring from the top edge of the sight is not accurate because it does not represent the true aiming line.
Place your measuring tool carefully between these two reference points. Keep the tool straight and avoid measuring at an angle, as this can create incorrect readings. Take your time to ensure the tool is positioned correctly.
Record the measurement after checking it more than once. Repeating the process helps confirm accuracy and reduces the chance of errors caused by tool placement or unclear reference points.
Check And Confirm The Measurement
After taking the initial measurement, review your results to make sure they are consistent. Small differences can occur depending on the position of the measuring tool, so repeating the measurement several times can provide a more reliable value.
Compare your measurement with the specifications provided for your firearm or sight system when available. Manufacturer information can help confirm whether your result is within the expected range for that setup.
Keep notes of your measurement, especially when working with different sight configurations. Recording sight height can be useful when replacing sights, adjusting accessories, or comparing how different setups affect aiming.
Accurate measurement depends on patience and attention to detail. By carefully identifying the bore centerline and sight centerline, you can determine the correct iron sight height and better understand the relationship between your sights and barrel.
How To Measure Sight Height For A Scope
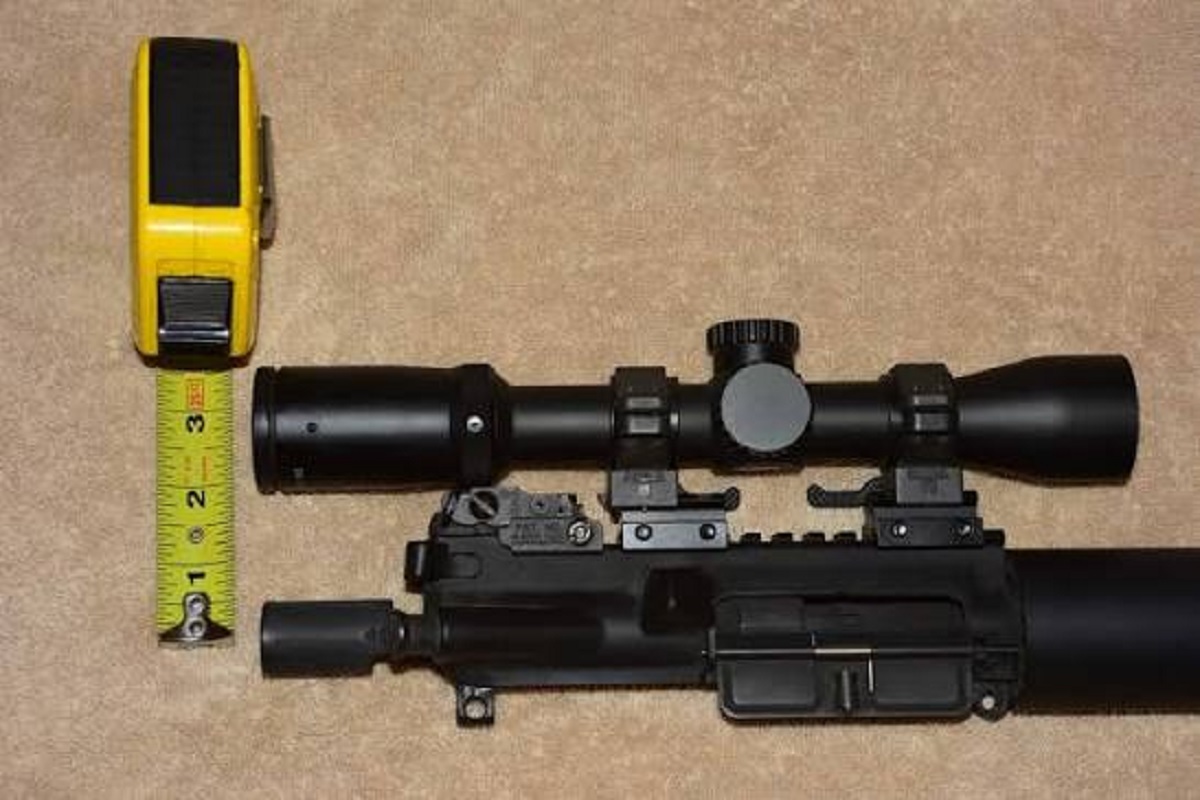
Measuring scope sight height involves finding the exact distance between the centerline of the firearm’s bore and the centerline of the mounted scope. This measurement is important for understanding your scope setup and making accurate adjustments. Taking careful measurements helps you evaluate your mounting system, compare different configurations, and maintain consistency when changing optics or accessories.
Identify The Scope Centerline
The first step in measuring scope height is locating the centerline of the scope. For most traditional tube-style scopes, the centerline runs through the middle of the main optic tube. This point is the reference location where the scope’s optical axis sits above the firearm’s barrel.
To find this measurement point, examine the scope tube and determine its diameter. The centerline is located halfway across the tube’s height. For example, a scope with a one-inch tube or a larger diameter tube will have a center point that can be calculated by dividing the tube measurement in half.
Make sure the scope is properly mounted before measuring. A loose optic or improperly installed rings can change the position and create inaccurate results. Confirm that the scope sits securely and maintains the intended alignment with the firearm.
Using the correct scope centerline ensures that your measurement represents the actual height of your optic system. This information helps you understand how the scope position relates to the barrel and sighting system.
Measure From The Bore Centerline To The Scope Centerline
After identifying the scope centerline, measure the distance between it and the bore centerline. The bore centerline represents the middle of the barrel where the projectile travels. This measurement shows how far above the barrel your scope is positioned.
Start by identifying the center of the barrel and then measure vertically to the center of the scope tube. A digital caliper or another precise measuring tool can help provide a more accurate reading. Avoid measuring from the outside of the barrel or the bottom of the scope because these points do not show the true sight height.
Keep the measuring tool positioned straight while taking the measurement. Any angle or uneven placement may affect the final result. Taking several measurements and comparing them can help confirm accuracy.
Recording the final measurement gives you a reliable reference for your scope setup. It can also help when making adjustments, selecting new mounts, or comparing different optic heights.
Check The Mount And Ring Height
Scope rings and mounting systems play a major role in determining overall sight height. The height of the rings, base, and mounting hardware affects how far the scope sits above the bore. Understanding these components helps you identify why different setups may produce different measurements.
Inspect the connection between the scope and firearm to ensure all parts are installed correctly. Loose mounts or incorrect ring placement can create inconsistencies and make your measurement unreliable. Proper installation provides a stable foundation for accurate calculations.
You can also compare your measurement with the specifications of your scope rings or mount manufacturer. These details can help verify whether your measured height matches the expected setup.
Keeping track of ring height and mounting information makes future changes easier. When replacing optics or changing mounts, having previous measurements allows you to create a similar setup without repeating unnecessary adjustments.
How To Measure Sight Height For A Red Dot Sight
Measuring sight height for a red dot sight requires understanding the position of the optic’s aiming point compared with the firearm’s bore. The process helps you determine the distance between the bore centerline and the red dot’s optical centerline. Accurate measurements allow you to better understand your setup and make informed decisions when adjusting or changing your optic configuration.
Locate The Red Dot Optical Centerline
The first step in measuring a red dot sight height is identifying the optical centerline of the sight. Unlike traditional iron sights, a red dot does not have a physical front or rear aiming point. Instead, the measurement is based on the center of the optic window where the illuminated dot appears.
To locate this point, find the middle of the red dot sight’s viewing window or emitter position, depending on the design. The centerline represents the path of the aiming point through the optic. This reference point is essential because measuring from the outer housing of the sight will not provide an accurate result.
Make sure the red dot sight is properly mounted before taking measurements. A loose mount or incorrect installation can change the optic’s position and affect your results. Check that the optic is secure and aligned correctly with the firearm.
Different red dot designs may have different shapes and mounting systems, so always consider the specific model when identifying the centerline. Understanding the optic structure helps you select the correct measurement point.
Measure The Distance Between The Bore And Red Dot Center
Once you identify the red dot centerline, the next step is measuring its distance from the bore centerline. The bore centerline represents the middle point of the firearm barrel, while the red dot centerline represents the aiming reference. The space between these two points determines the sight height.
Use a precise measuring tool to check the vertical distance between these reference points. A digital caliper or similar measuring device can help provide accurate results. Avoid measuring from the top of the firearm or the bottom of the optic because these locations do not represent the true relationship between the bore and sight.
Keep the measuring tool positioned straight to prevent inaccurate readings. Taking measurements from an angle can create incorrect values and affect your understanding of the optic setup.
Repeat the measurement several times to confirm consistency. Recording the results allows you to keep a reference for future changes, such as replacing mounts or adjusting the red dot position.
Consider The Mounting System And Height
The mounting system has a major impact on red dot sight height. Different mounts, adapters, and risers can place the optic at various heights above the bore. Understanding these components helps you determine why one red dot setup may sit higher or lower than another.
Before measuring, inspect the mount to ensure it is installed correctly and securely. A loose mounting system can shift the optic position and create unreliable measurements. Proper installation provides a stable base for accurate sight height calculations.
Take note of the mount type and any additional hardware used with the red dot sight. These details can affect the final measurement and may be useful when comparing different setups.
Keeping records of your red dot height measurements and mounting details can make future adjustments easier. This information helps you maintain consistency when changing optics, mounts, or firearm configurations.
Factors That Can Affect Sight Height Measurements
Several factors can influence the accuracy of sight height measurements, making it important to understand what may cause variations. Small differences in tools, setup, or measurement methods can change the final result. By recognizing these factors, you can improve consistency and collect more reliable information when checking the relationship between the firearm’s bore and sight system.
Incorrect Measurement Reference Points
One of the most common factors affecting sight height measurements is using incorrect reference points. Sight height is determined by measuring the distance between the bore centerline and the sight or optic centerline. Measuring from the outside surface of the barrel or the top of the sight can create inaccurate results.
The bore centerline can be difficult to identify because it is not a visible physical line. Estimating this point incorrectly may lead to a measurement that does not represent the true height of the sight system. Taking time to locate the proper reference points helps improve accuracy.
The sight centerline must also be identified correctly. For optics, this usually refers to the center of the scope tube or red dot window. For iron sights, the measurement depends on the alignment point used during aiming.
Using consistent reference points every time allows you to compare measurements more effectively. A small mistake in identifying these locations can create noticeable differences, especially when making precise adjustments.
Measuring Tool Accuracy And Position
The quality and condition of your measuring tool can directly affect sight height measurements. Tools with unclear markings, damage, or limited precision may produce unreliable readings. Using a suitable measuring device designed for accurate measurements helps reduce errors.
The position of the measuring tool also plays an important role. Holding the tool at an angle or placing it unevenly can change the distance being measured. A straight and stable position provides a more accurate representation of the space between the bore and sight centerlines.
Environmental conditions can also influence measurement results. Poor lighting may make it difficult to identify exact points, while an unstable workspace can cause movement during the process. Creating a controlled environment improves consistency.
Taking multiple measurements is a useful way to confirm accuracy. Comparing several readings helps identify mistakes and provides a more dependable final measurement for your sight setup.
Firearm And Optic Setup Differences
The configuration of the firearm and optic system can create variations in sight height measurements. Different firearms have unique designs, and barrel shapes, receivers, and mounting systems can affect the final distance between the bore and sight.
Optic mounts, rings, adapters, and risers all contribute to the overall height. A small difference in mounting hardware can change the position of the sight above the barrel. Checking each component carefully helps you understand how the setup affects measurement results.
A loose optic or improperly installed mount can also create inaccurate readings. Before measuring, make sure all components are securely attached and positioned correctly. Stability is necessary for collecting consistent information.
Changes made to the firearm after measurement can also affect the results. Replacing sights, changing mounts, or adjusting components may require taking new measurements to maintain accurate records.
FAQs
What Is The Purpose Of Measuring Sight Height?
Measuring sight height helps you understand the distance between the firearm’s bore centerline and the centerline of the sight or optic. You use this measurement to evaluate how your aiming system is positioned compared with the barrel. Accurate sight height information can help you make better adjustments, choose suitable mounts, and compare different sight setups. When you know the correct measurement, you can better understand how changes to your optic or sights may influence your overall setup and aiming process.
How Do You Measure Sight Height Accurately?
To measure sight height accurately, you need to identify the correct reference points and use a precise measuring tool. You measure the distance from the center of the bore to the center of the sight or optic. A digital caliper or another accurate measuring device can help you collect reliable results.
You should take multiple measurements and keep the tool properly aligned during the process. Recording your results also helps you compare different setups and avoid errors when making future changes.
What Tools Do You Need To Measure Sight Height?
You need a few basic tools to measure sight height properly. A digital caliper is one of the most useful options because it provides accurate readings for small distances. You may also use a ruler with clear markings for simple measurements, although it may not offer the same precision.
A stable workspace and good lighting are also important because they help you identify measurement points clearly. Keeping notes of your measurements can make it easier to track changes when adjusting or replacing sights and optics.
How Do You Measure Sight Height With A Scope?
To measure sight height with a scope, you need to find the distance between the centerline of the barrel and the centerline of the scope tube. First, identify the middle point of the scope tube, which represents the optic centerline.
Then measure vertically down to the bore centerline using a suitable measuring tool. You should avoid measuring from the bottom of the scope or outside of the barrel because these points do not provide accurate results.
Checking your scope mount, rings, and installation can also help ensure the measurement reflects your actual setup.
How Do You Measure Sight Height For A Red Dot Sight?
You measure red dot sight height by finding the distance between the bore centerline and the optical centerline of the red dot. Unlike iron sights, a red dot uses the center of the viewing window or aiming point as the reference location.
Start by identifying the center of the optic and then measure the vertical distance to the center of the barrel. You should make sure the red dot mount is secure before measuring because loose components can affect accuracy.
Taking several readings helps you confirm the correct measurement for your setup.
Why Does Sight Height Matter For Accuracy?
Sight height matters because it affects the relationship between your aiming point and the path of the projectile. A higher or lower sight position can change how you adjust your setup and understand your point of impact.
When you know your sight height, you can make more informed decisions about optics, mounts, and sight adjustments. It also helps you compare different configurations and understand how changes may influence your shooting setup.
Accurate measurements provide useful information for maintaining consistency and improving your overall understanding of your firearm’s sight system.
What Factors Can Affect Sight Height Measurements?
Several factors can affect the accuracy of your sight height measurements. Incorrect reference points, poor measuring tools, and improper positioning can all create inaccurate results. You need to measure from the bore centerline to the sight or optic centerline for the most reliable calculation.
The type of firearm, optic, mount, and installation method can also influence the final measurement. A loose scope mount or incorrectly positioned sight may change the results.
Taking your time, using proper tools, and repeating measurements can help you achieve more consistent and dependable sight height information.
Final Thoughts
Accurate measurements play an important role in achieving better performance and consistency with any sighting system. Taking the time to use the right tools, identify the correct measurement points, and verify your results can help prevent errors that may affect accuracy.
Understanding how to measure sight height allows you to properly set up your firearm, adjust optics, and make more informed decisions when improving your setup. Careful measurement ensures that your sights align correctly with the bore and supports more reliable adjustments.
Regularly checking your sight height after making changes to your equipment can help maintain accuracy over time. Whether you are installing new sights or adjusting an optic, knowing how to measure sight height gives you the confidence to create a properly configured and dependable system.