How to Build a Wooden Gun Safe – A Practical DIY Guide for Secure Storage
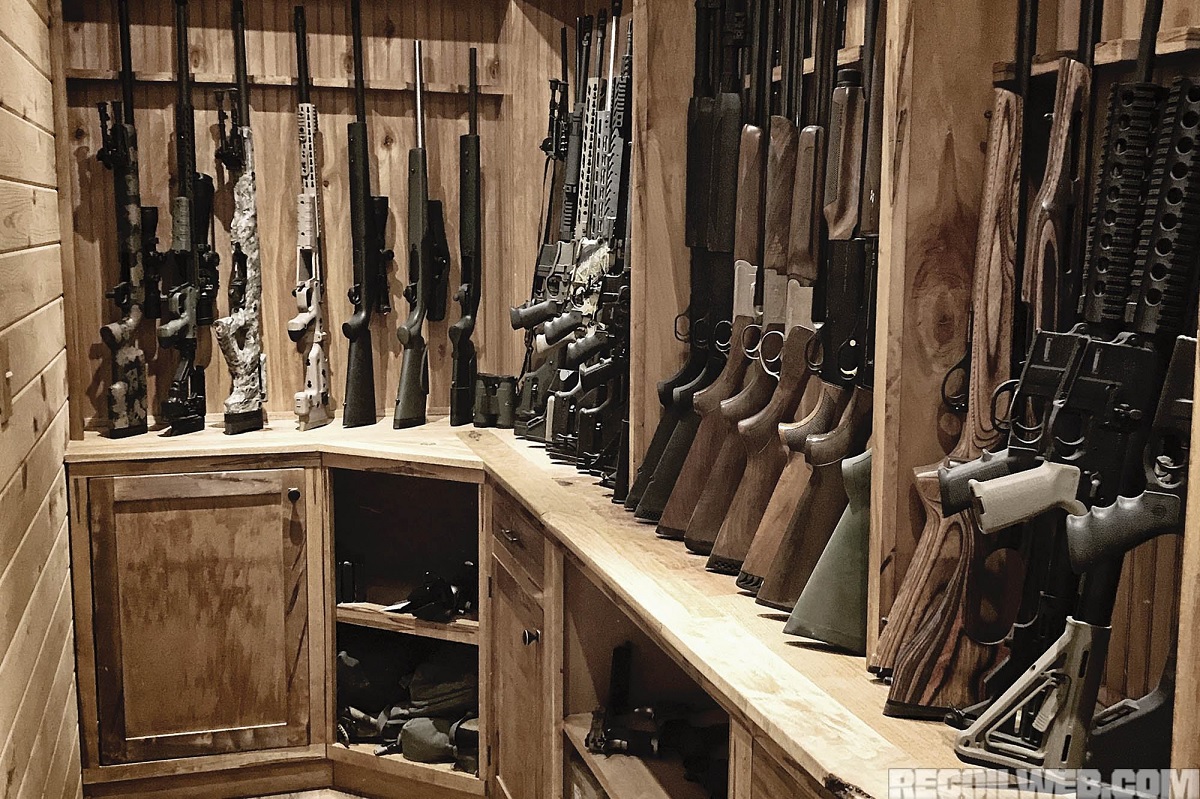
Building secure firearm storage at home can be a rewarding project when you want something that fits your available space, storage needs, and personal style. A well-designed wooden safe can also blend naturally with existing furniture while providing an organized place to store firearms and related equipment.
Learning how to build a wooden gun safe involves more than simply assembling wooden panels. You need to consider the strength of the materials, interior layout, door construction, locking hardware, and ways to prevent unauthorized access.
Careful measurements and solid construction are essential for creating a storage unit that is both practical and durable. The design can also be customized with shelves, compartments, protective lining, and space for accessories.
With proper planning and suitable security features, a wooden gun safe project can become a functional addition to your home. The key is to focus on responsible storage, reliable locking mechanisms, and compliance with applicable local laws and safety requirements.
Choose the Right Size and Storage Capacity
Choosing the right size is an important part of building a wooden gun safe because the storage capacity affects its design, placement, and everyday use. The safe should provide enough room for firearms, accessories, and protective storage features without becoming unnecessarily large. Careful planning also helps you create an organized interior that remains practical as your storage needs change.
Measure Your Available Space
Before deciding on the dimensions of the wooden gun safe, measure the location where you plan to place it. Consider the height, width, and depth of the available area, while also leaving enough room for the door to open comfortably. Avoid designing the safe based only on the number of firearms you currently own.
Think about accessories, storage containers, and possible future needs. A properly measured design can prevent the safe from feeling overcrowded or difficult to access. It can also help you choose suitable materials and create a balanced structure that fits naturally into the intended space.
Plan Storage for Firearms and Accessories
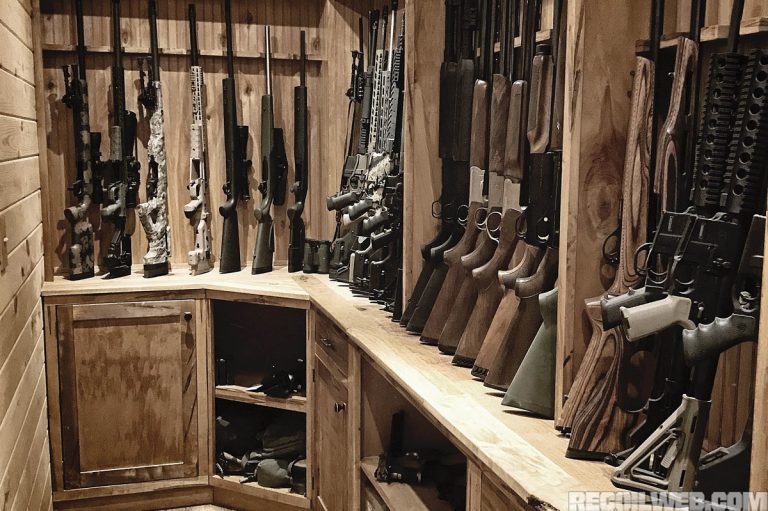
The interior should be organized according to the type and amount of equipment you need to store. Long guns generally require more vertical space, while smaller firearms and accessories may need separate shelves or compartments. Planning these areas in advance can make the storage system easier to use and maintain.
You can include adjustable shelving to create flexibility and avoid wasting valuable space. Consider leaving room for protective cases, cleaning supplies, and other lawful accessories. A clear layout also helps prevent items from being placed on top of one another, reducing clutter and making the contents easier to inspect when needed.
Allow Extra Capacity for Future Needs
Building a safe that only meets your current storage requirements may create limitations later. Adding extra capacity during the planning stage can make the wooden gun safe more useful over time without requiring a complete redesign. Consider including additional shelf space or an interior layout that can be adjusted when your needs change.
However, larger dimensions should still match the available room and the strength of the overall structure. Extra space can also improve organization by allowing items to be stored separately. Planning ahead creates a more practical storage solution and helps you avoid an interior that becomes crowded too quickly.
Consider Interior Layout and Accessibility
Storage capacity is not only about creating a larger interior. The way the available space is arranged can significantly affect how useful the safe becomes. Divide the interior into practical sections based on the size and type of items being stored. Shelves, separate compartments, and supportive storage areas can help keep everything organized.
Make sure commonly accessed items can be reached without moving multiple objects out of the way. The door opening should also provide sufficient access to the interior. A thoughtful layout makes better use of the available capacity while helping maintain an orderly and responsible storage environment.
Select Strong and Durable Wood Materials
The quality of the wood plays an important role in the strength, durability, and overall appearance of a wooden gun safe. Choosing suitable materials helps create a stable structure that can handle regular use and support the intended storage weight.
Before selecting the wood, consider its density, thickness, resistance to warping, and overall condition. Using reliable materials can also improve the lifespan and appearance of the finished storage unit.
Choose Dense Hardwood for the Main Structure
Dense hardwood can be a suitable choice for the main structure because it offers greater durability and resistance to everyday wear. Woods such as oak and maple are commonly valued for their strength and solid construction qualities.
Before using any boards, inspect them for cracks, splits, excessive knots, or other visible damage. Properly dried wood can also help reduce the risk of movement or warping over time.
The overall weight of the finished unit should also be considered during material selection. A strong wooden structure should be combined with appropriate secure storage features rather than relying on the wood alone for protection.
Check the Wood Thickness and Quality
Wood thickness has a direct effect on the stability and strength of the storage structure. Thin boards may bend, sag, or become damaged more easily when they are used for larger panels or weight-bearing shelves.
Thicker and properly prepared panels can provide better rigidity and help the structure maintain its shape. However, the appropriate thickness should match the overall design and the weight the individual components are expected to support.
Inspect every piece before construction begins. Avoid boards with moisture damage, serious warping, deep cracks, or uneven surfaces, as poor-quality materials can create structural weaknesses and make assembly more difficult.
Use Plywood Carefully for Interior Components
High-quality plywood can be useful for interior components such as shelves, dividers, and backing panels. It can provide a consistent surface and may offer good dimensional stability when an appropriate grade is selected.
Not all plywood products provide the same level of durability. Choose a strong, good-quality option for components that need to support additional weight, and avoid weak or damaged sheets that may separate over time.
Proper fastening and finishing can also improve the durability of plywood components. Combining solid wood for major structural areas with suitable plywood for selected interior sections can create a practical balance between strength and material efficiency.
Protect the Wood From Moisture and Wear
Wood can gradually lose its quality when exposed to moisture, temperature changes, and regular surface wear. Applying an appropriate protective finish can help maintain its appearance and reduce the risk of damage over time.
Make sure the wood is clean, dry, and properly sanded before applying any finish. Pay particular attention to edges, corners, and joints, as these areas may be more vulnerable to moisture and everyday wear.
Regular inspection and proper placement can further help preserve the material. Keeping the storage unit away from excessive dampness and maintaining a suitable indoor environment can support the long-term durability of the wooden structure.
Gather the Essential Tools and Hardware
Before starting the construction process, gathering the necessary tools and hardware can make the project more organized and manageable. Having everything prepared in advance reduces unnecessary interruptions and helps you work with greater accuracy. Focus on tools that support measuring, cutting, assembling, and finishing, while selecting suitable hardware for the specific design and intended storage requirements.
Prepare Accurate Measuring and Marking Tools
Accurate measurements are essential when preparing wooden panels and planning the overall structure. A measuring tape, ruler, carpenter’s square, and pencil can help you mark dimensions clearly before cutting or assembling the materials.
Using proper measuring tools can reduce mistakes and help ensure that panels, shelves, and other components fit together correctly. Taking time to check measurements more than once can prevent wasted materials and unnecessary adjustments later.
A level may also be useful when positioning the structure and checking that major components are properly aligned. Careful marking and accurate measurements create a stronger foundation for the remaining construction work.
Gather Suitable Cutting and Shaping Tools
The type of cutting tools you need will depend on the materials and design you choose. A suitable saw can help cut wooden boards and panels according to the planned dimensions, while additional shaping tools may be useful for smoothing rough areas.
Always keep the workspace organized and use tools according to their intended purpose. Dull or damaged equipment can make cuts less accurate and may damage the wood during the construction process.
Sandpaper or a sanding tool can also help create smoother surfaces and prepare the wood for finishing. Properly smoothing edges and surfaces can improve both the appearance and usability of the completed structure.
Select Reliable Fasteners and Assembly Hardware
The right hardware helps connect the different wooden components securely and maintain the stability of the overall structure. Depending on the design, you may need suitable screws, bolts, brackets, hinges, and other assembly hardware.
Choose hardware that matches the thickness and type of material being used. Poor-quality or incorrectly sized fasteners may weaken connections or create problems during regular use.
Keep the required hardware organized before beginning the assembly process. Separating different sizes and types can make the work easier and help you avoid using unsuitable components in the wrong areas.
Include Appropriate Safety and Finishing Supplies
Basic safety equipment should be available before working with wood and construction tools. Protective eyewear, gloves suited to the task, and a clean workspace can help reduce common risks while measuring, cutting, and assembling materials.
You may also need finishing supplies to protect the wooden surfaces from everyday wear and environmental exposure. Suitable wood finishes, brushes, applicators, and clean cloths can help complete the surface preparation.
Keep all tools and supplies within easy reach, but maintain an uncluttered work area. A well-prepared workspace makes it easier to focus on accurate construction, careful assembly, and responsible storage planning.
Create a Detailed Design and Cutting Plan
A detailed design and cutting plan helps organize the construction process before any materials are prepared. It allows you to visualize the overall structure, confirm the required dimensions, and identify the wooden components needed for the project. Careful planning can also reduce material waste, improve accuracy, and make the assembly process easier to manage.
Determine the Overall Dimensions
Start by deciding the appropriate height, width, and depth based on the available installation space and your intended storage requirements. Write down each measurement clearly and keep the proportions practical for the location where the unit will be placed.
Consider the thickness of the wood when calculating the internal dimensions. Exterior measurements alone may not accurately represent the amount of usable interior space after the panels, shelves, and other components are installed.
Review all measurements before moving forward with the cutting process. Checking the dimensions carefully can help prevent fitting problems and reduce the need to replace materials because of measurement mistakes.
Sketch the Interior and Exterior Layout
Create a simple drawing that shows both the exterior shape and the planned interior arrangement. Include the main panels, door, shelves, dividers, and other storage sections that are part of your chosen design.
A clear sketch makes it easier to understand how each component will connect during assembly. You do not need an advanced technical drawing, but the layout should clearly show the approximate position and size of every major section.
Label the important dimensions directly on the design. This can provide a useful reference throughout the project and help you maintain consistency when preparing the different wooden pieces.
Prepare a Complete Cutting List
A cutting list should include every wooden component required for the design. Record the length, width, thickness, and quantity of each piece so you can prepare the materials in an organized manner.
Group similar components together to make the list easier to follow. For example, shelves, side panels, and backing sections can be listed separately, allowing you to check that every required piece has been included.
Review the cutting list against your design before beginning any work. This extra step can help identify missing components, incorrect measurements, or unnecessary material before the project moves into the preparation stage.
Plan for Accurate Assembly and Adjustments
Your design plan should also consider how the different components will fit together during assembly. Leave appropriate allowances where necessary for material thickness, hardware, and the natural movement of wooden components over time.
Mark each piece clearly after preparation so similar panels are not confused during assembly. Simple labels can save time and make it easier to follow the original design without repeatedly checking measurements.
Keep the plan available throughout the project and update it when a necessary design adjustment is made. Maintaining an accurate reference can help keep the construction process organized while supporting a consistent final structure.
Build a Reinforced Wooden Frame
A reinforced wooden frame provides the main structural support for the entire storage unit. Building this section carefully helps keep the panels aligned and creates a stable base for the remaining components. The frame should be planned according to the overall dimensions, material thickness, and intended weight so that the finished structure remains balanced and durable.
Prepare and Check the Main Frame Components
Begin by organizing the wooden pieces according to the measurements in your cutting plan. Separate the side, top, bottom, and supporting components to make the assembly process easier to follow. Check each piece before joining them together.
Make sure the boards are straight and free from serious cracks, warping, or other visible damage. Uneven materials can affect the alignment of the entire frame and create unnecessary gaps between connected sections.
Place the main components in their planned positions before permanently securing them. This dry fitting process allows you to check the dimensions and identify alignment issues while adjustments can still be made easily.
Reinforce the Corners and Main Joints
The corners and connecting joints require particular attention because they help hold the main structure together. Suitable wood joints, strong fasteners, and properly fitted reinforcement pieces can improve the overall stability of the frame.
Make sure every connection fits closely before securing it. Poorly aligned joints may place uneven stress on the wood and can gradually weaken the structure during regular use.
Additional support blocks or braces can be included where the design requires greater rigidity. Keep the reinforcement balanced throughout the structure so that the frame remains properly aligned instead of becoming uneven or distorted.
Add Internal Support for Greater Stability
Internal supports can help strengthen larger sections of the frame and reduce unnecessary movement. Depending on the size and layout, vertical or horizontal support pieces may be added to areas that need additional structural stability.
Plan these supports carefully so they do not interfere with the intended interior layout. Shelves, dividers, and other components should still fit correctly after the reinforcement pieces are installed.
Check the frame regularly as you add each supporting component. Using a level and measuring tools can help confirm that the structure remains square and properly positioned throughout the assembly process.
Inspect the Frame Before Adding Other Components
Before attaching exterior panels or interior sections, inspect the completed frame carefully. Check for loose connections, uneven corners, visible gaps, or areas that may require adjustment before continuing with the construction process.
Confirm that the frame sits evenly and that the main dimensions still match your original design plan. Correcting alignment problems at this stage can be easier than making changes after additional components have been installed.
Once the structure has been inspected, clean away excess dust and wood debris from the working area. A properly prepared frame provides a stable foundation for the next stages while supporting an organized and durable overall design.
Frequently Asked Questions
What Tools Do You Need To Build A Wooden Gun Safe?
You will generally need basic measuring, cutting, assembling, and finishing tools for the woodworking portion of the project. Common examples include a measuring tape, carpenter’s square, suitable saw, drill, sanding equipment, clamps, and appropriate fasteners.
You should also prepare suitable safety equipment and keep the workspace clean and organized. The exact tools depend on your design and materials, so review your cutting plan before starting. For secure firearm storage, focus on a properly designed locking solution and compliance with applicable laws rather than assuming a homemade wooden structure provides the same protection as a certified safe.
Is A Wooden Gun Safe As Secure As A Metal Gun Safe?
A wooden gun safe can provide an organized, lockable storage enclosure, but it generally should not be assumed to offer the same level of protection as a professionally manufactured and tested steel safe. Protection can vary significantly depending on construction, locking hardware, installation, and the surrounding environment.
You should consider the limitations of the design before relying on it for high-security or fire protection. A commercially rated safe may be more appropriate when specific burglary or fire-resistance standards are required. Regardless of the storage type, firearms should be secured from unauthorized users and stored according to applicable laws and safety requirements.
How Can You Organize The Inside Of A Wooden Gun Safe?
You can organize the interior by separating firearms from other stored items and creating designated areas that reduce clutter. Adjustable shelves, dividers, and protective interior surfaces can help make better use of the available space while keeping items from being unnecessarily crowded together.
Plan the layout according to the dimensions of the items you intend to store and leave sufficient space for safe access. Avoid storing firearms in a way that allows unauthorized users to reach them easily. When firearms are not in use, safe-storage guidance emphasizes keeping them locked and unloaded, with ammunition stored separately and access restricted to authorized users.
Can A Wooden Gun Safe Protect Firearms From Moisture?
A well-maintained wooden storage unit can help protect firearms from dust and some environmental exposure, but wood alone does not automatically control humidity. Moisture, condensation, and unsuitable storage conditions can affect both the firearm and the structural materials over time.
You should place the storage unit in a suitable indoor environment and inspect it regularly for signs of dampness or deterioration. Keep the interior clean and dry, and follow the firearm manufacturer’s maintenance guidance. Pay attention to environmental conditions because excessive dampness and condensation can damage stored firearms and may also weaken the cabinet or its fixings.
Should You Secure A Wooden Gun Safe To A Wall Or Floor?
Securing a storage unit can help prevent it from being easily moved, but the appropriate installation method depends on the building structure, the weight of the unit, and local legal or safety requirements. Improper installation may damage the wall, floor, or storage unit.
You should follow applicable regulations and use a qualified professional when structural or security requirements are uncertain. The anchoring method should be suitable for the specific building materials rather than relying on a generic approach. Official firearm-security guidance also emphasizes considering the location, environment, and appropriate fixing method when installing secure storage.
Is It Legal To Build Your Own Wooden Gun Safe?
The legality of building and using your own wooden gun safe depends on the firearm laws and storage requirements that apply where you live. Some jurisdictions may have specific standards regarding the type, construction, locking method, or installation of firearm storage.
Before relying on a homemade unit, you should check the requirements of your local authorities and any conditions connected to firearm ownership or licensing. A storage cabinet that appears strong may still fail to meet a legally required standard. It is also important to remember that local rules can change, so verify the current requirements before completing the project or using the unit for firearm storage
Final Thoughts
Building secure storage requires careful planning, strong materials, and attention to every detail. A well-designed wooden safe can provide organized storage while helping protect firearms from unauthorized access, damage, and environmental conditions. Strong joints, reinforced doors, reliable locks, and secure anchoring all contribute to a safer final result.
When learning how to build a wooden gun safe, focus on durability and security rather than appearance alone. Measure the available space carefully, choose quality materials, and regularly inspect the structure, hinges, and locking components to ensure everything remains in proper working condition.
Most importantly, always follow applicable local laws and safe firearm-storage practices. A DIY wooden safe may offer useful storage, but it should be designed responsibly and maintained regularly. With proper planning and a strong focus on security, you can create a practical storage solution that supports safer and more organized firearm ownership.