How to Mount Sight on Shotgun? Step-by-Step Guide for Better Accuracy and Performance
Adding a sight to a shotgun can improve aiming confidence, target visibility, and overall shooting performance. Whether you use a shotgun for hunting, sport shooting, or personal defense, choosing the right sight and installing it correctly can make a noticeable difference in how accurately you aim.
Many shotgun owners search for how to mount sight on shotgun because the installation process depends on the shotgun type, sight design, and available mounting options. A properly installed sight needs to remain secure and aligned to provide consistent performance.
Understanding the required tools, mounting methods, and adjustment process helps you avoid common installation mistakes. From bead replacements to rail-mounted optics, different shotgun setups may require different approaches.
This guide explains how to mount sight on shotgun by covering the necessary equipment, installation steps, sight alignment, and important factors to consider. Following the right process helps you create a reliable setup that matches your shooting needs.
How to Mount Sight on Shotgun Properly
Installing a sight on a shotgun requires careful preparation, the right equipment, and proper alignment to achieve reliable performance. The mounting process can vary depending on the shotgun model and type of sight being used. Understanding the correct steps helps ensure the sight remains secure, maintains accuracy, and improves your overall shooting experience.
Choose the Right Sight and Mounting System
Before installing a sight, you need to select a model that matches your shotgun and intended use. Shotguns can support different types of sights, including red dot optics, ghost ring sights, rifle-style sights, and upgraded bead sights. Each option provides different benefits depending on whether you use your shotgun for hunting, competition, or defensive purposes.
You should also confirm that your shotgun has the proper mounting system. Some shotguns include factory rails or drilled receiver holes, while others may require an aftermarket mount. Choosing a compatible sight and mounting solution prevents installation problems and ensures a stable connection between the sight and firearm.
Prepare the Shotgun and Required Tools
Proper preparation helps create a safer and more effective installation process. Before mounting the sight, make sure the shotgun is unloaded and inspect the firearm carefully. Gather the necessary tools, which may include screwdrivers, mounting hardware, torque tools, and cleaning supplies depending on the sight type.
Cleaning the mounting surface before installation helps remove oil, dirt, and debris that could prevent the sight from sitting securely. A clean connection between the mount and shotgun improves stability and reduces the chance of the sight shifting during use.
Reading the sight manufacturer’s instructions is also important because different models may have specific installation requirements. Following the recommended steps helps protect both the sight and shotgun from unnecessary damage.
Attach and Secure the Sight Mount
Once the shotgun and mounting system are prepared, position the sight mount according to the manufacturer’s guidelines. Make sure the mount sits evenly and aligns correctly with the shotgun’s receiver or barrel system. Uneven placement can affect accuracy and make later adjustments more difficult.
Tighten the mounting screws carefully to the recommended specifications. Over-tightening can damage components, while loose screws may allow the sight to move during recoil. Using the correct torque settings helps create a secure attachment while protecting the mounting hardware.
After securing the mount, check that the sight feels stable and does not shift when gentle pressure is applied. A properly installed sight should remain firmly attached during regular shooting conditions.
Adjust and Test the Shotgun Sight
After mounting the sight, the next step is adjusting it for proper alignment. Sight adjustment allows you to match the point of aim with the point of impact. Many shooters begin with basic alignment at a short distance before making further adjustments during live-fire testing.
During testing, pay attention to consistency and whether the sight maintains its position after repeated shots. Recoil can reveal loose mounting issues that may not be noticeable during installation. Making small adjustments gradually helps achieve better accuracy.
Regularly checking the sight mount and screws after use helps maintain reliable performance. Proper installation combined with routine inspection keeps the sight functioning effectively for future shooting sessions.
Tools Needed to Install a Shotgun Sight
Installing a shotgun sight requires the right tools to create a secure and properly aligned setup. Having the necessary equipment before starting makes the process smoother and helps prevent damage to the firearm or sight components. The specific tools you need may vary depending on the sight type, mounting system, and shotgun model you are working with.
Screwdrivers and Proper Bit Sets
A quality screwdriver set with the correct bits is one of the most important tools for installing a shotgun sight. Many sights and mounting systems use small screws that require precise fitting to avoid stripping the heads or damaging the hardware. Using the wrong screwdriver size can make installation more difficult and may affect the security of the mount.
You should choose bits that match the exact screws included with your sight or mounting system. A precision bit set designed for firearm applications provides better control and reduces the risk of accidental damage. Keeping the tools clean and in good condition also helps ensure proper installation.
Torque Wrench for Accurate Tightening
A torque wrench is an essential tool when installing many shotgun sights, especially optics and rail-mounted systems. It allows you to tighten screws to the recommended specifications without applying too much or too little pressure. Proper torque helps maintain stability while protecting the sight and mounting components.
Over-tightening screws can damage threads, crack components, or create uneven pressure on the mount. Under-tightening can allow the sight to shift during recoil, affecting accuracy. Using a torque wrench provides consistent results and helps ensure the sight remains securely attached during repeated use.
Following the manufacturer’s torque recommendations is important because different sights and mounts may require different settings.
Cleaning Supplies and Mounting Preparation Tools
Cleaning supplies help prepare the shotgun surface before installing the sight. A clean mounting area allows the sight or rail system to sit properly and reduces the chance of movement caused by dirt, oil, or debris. Basic supplies may include cleaning cloths, degreasing products, and brushes.
Removing excess oil from screw areas is especially important because it can affect how securely the mounting hardware holds. A properly prepared surface creates better contact between components and improves overall installation quality.
Having these preparation tools ready before installation saves time and helps create a more reliable connection between the shotgun and sight system.
Leveling Tools and Alignment Equipment
Leveling and alignment tools help ensure the shotgun sight is positioned correctly before final tightening. A small firearm level can help keep optics properly aligned, especially when installing red dot sights or other precision aiming systems. Correct alignment improves consistency and makes sight adjustments easier.
You may also use measuring tools or alignment aids to confirm that the sight sits evenly on the shotgun. Taking time to check positioning before tightening prevents unnecessary adjustments later.
A properly aligned sight improves the overall shooting experience by helping you maintain a consistent point of aim. Using the right tools during installation creates a secure setup that performs reliably during use.
How to Choose the Right Sight for Your Shotgun
Selecting the right shotgun sight depends on your shooting style, intended purpose, and personal preferences. Different sights offer unique advantages for hunting, sport shooting, and defensive applications. Understanding factors such as visibility, durability, compatibility, and ease of use helps you choose a sight that improves aiming confidence and matches your specific shotgun setup.
Consider Your Primary Shooting Purpose
The first step in choosing a shotgun sight is determining how you plan to use your firearm. Hunters may prefer sights that provide quick target acquisition in outdoor environments, while competitive shooters often look for options that improve speed and consistency. Defensive users may prioritize sights that allow fast aiming in stressful situations.
Your shooting purpose influences the type of sight that works best for your needs. A simple bead sight may be enough for traditional shotgun use, while a red dot or ghost ring sight may provide additional advantages for more precise aiming. Understanding your main application prevents you from selecting a sight with unnecessary features.
Understand Different Types of Shotgun Sights
Shotgun sights come in several designs, and each type offers different benefits. Bead sights are common on many shotguns because they are simple, lightweight, and easy to use. They work well for quick shooting situations where precision at longer distances is less important.
Ghost ring sights provide a clearer aiming system with improved accuracy compared to traditional beads. Red dot sights are popular because they allow quick target acquisition and provide a visible aiming point without requiring perfect alignment between front and rear sights.
Choosing between these options depends on your shooting requirements, experience level, and the performance you expect from your shotgun.
Check Compatibility With Your Shotgun
Before purchasing a sight, you need to confirm that it is compatible with your specific shotgun model. Different shotguns may require different mounting systems, rails, or installation methods. A sight that works well on one shotgun may not fit another without additional hardware.
Checking the manufacturer’s specifications helps ensure the sight and mounting system match your firearm. You should also consider how the sight affects the shotgun’s balance, handling, and overall size, especially if you use it for hunting or carrying in the field.
A properly matched sight provides better stability and reduces the chance of installation or performance issues.
Evaluate Durability and Ease of Use
A shotgun sight should be durable enough to handle recoil, weather conditions, and regular use. Choosing a sight made from quality materials helps ensure it maintains alignment and performs consistently over time. Features such as waterproof construction and strong mounting systems can improve reliability in demanding environments.
Ease of use is another important factor when selecting a sight. A good sight should allow quick target acquisition and simple adjustments without unnecessary complexity. Features like clear markings, adjustable brightness settings, or easy windage and elevation controls can improve your overall shooting experience.
Balancing durability, functionality, and ease of operation helps you select a shotgun sight that meets your needs and provides dependable performance.
Step-by-Step Process to Mount a Sight on a Shotgun
Mounting a sight on a shotgun requires careful preparation, proper tools, and attention to detail to ensure a secure installation. A correctly installed sight improves aiming consistency and helps maintain reliable performance during use. Understanding each step of the mounting process allows you to avoid common mistakes and create a stable setup that matches your shooting needs.
Prepare the Shotgun and Gather Required Tools
Before starting the installation process, you should prepare your shotgun and collect all necessary tools. Make sure the shotgun is completely unloaded and inspect the firearm to confirm there is no ammunition present. Safety should always be the first priority before handling any installation work.
The tools needed may vary depending on the sight and mounting system, but common items include screwdrivers, appropriate bits, cleaning supplies, and a torque wrench. Having the correct equipment available prevents interruptions and reduces the risk of damaging the sight or mounting hardware.
You should also review the manufacturer’s instructions for both the shotgun and sight. Different models may have specific requirements for installation, screw placement, or torque settings.
Clean and Prepare the Mounting Surface
A clean mounting surface is essential for creating a secure connection between the shotgun and sight. Before attaching the sight, remove dirt, oil, and debris from the area where the mount will be installed. Any residue can prevent the sight from sitting evenly and may cause movement during use.
Use appropriate cleaning materials to prepare the mounting area without damaging the firearm’s finish. Pay close attention to screw holes, rails, or mounting points because these areas directly affect the stability of the sight.
Proper preparation creates a stronger connection and helps ensure that the sight remains aligned after repeated shooting. Taking extra time during this step can prevent adjustment problems later.
Attach the Sight Mount and Secure Hardware
Once the surface is prepared, position the sight mount according to the manufacturer’s guidelines. Ensure that the mount sits evenly and aligns correctly with the shotgun’s receiver, barrel, or existing rail system. Incorrect positioning can affect accuracy and make sight adjustments more difficult.
Install the mounting screws carefully and tighten them gradually. Using a torque wrench helps you apply the correct amount of pressure while avoiding over-tightening. Excessive force can damage components, while loose screws may allow the sight to shift from recoil.
After securing the mount, check that it remains stable and properly seated. A firm attachment provides a reliable foundation for the sight and improves overall performance.
Install and Adjust the Shotgun Sight
After the mount is securely attached, install the sight according to the manufacturer’s instructions. Position the sight correctly and confirm that all mounting hardware is tightened to the recommended specifications. Proper placement helps ensure comfortable viewing and consistent aiming.
Once installed, adjust the sight to match your shooting preferences. Initial adjustments can be made before testing, but final alignment usually requires checking performance during actual shooting sessions. Small changes to windage and elevation may be needed to achieve the desired point of impact.
Regularly inspect the sight after use to ensure screws remain secure and alignment has not changed. Proper installation and routine checks help maintain dependable performance over time.
How to Properly Align a Shotgun Sight
Proper sight alignment is essential for improving accuracy and consistency when using a shotgun. A correctly positioned sight helps you maintain a reliable point of aim and ensures the firearm performs as expected. Whether you are installing a new sight or adjusting an existing one, understanding the alignment process helps create a more dependable shooting setup.
Check the Sight Position Before Adjustment
Before making any adjustments, you should inspect the position of the shotgun sight and confirm that it is mounted securely. A loose or incorrectly installed sight can create alignment problems and make accurate adjustments difficult. Checking the mounting screws and ensuring the sight sits evenly on the shotgun is an important first step.
The sight should be positioned comfortably so you can quickly acquire your target while maintaining a natural shooting stance. An improperly placed sight may force you to adjust your head position or shooting style, which can affect consistency.
Taking time to verify the initial installation prevents unnecessary adjustments and helps you create a stable foundation for proper sight alignment.
Align the Front and Rear Sight Components
For shotgun setups that use front and rear sights, proper alignment requires positioning both components correctly when aiming. The front sight should appear centered within the rear sight opening while maintaining the correct height relationship between the two points.
Your eye should naturally focus on the front sight while keeping the target and rear sight properly aligned. Consistent positioning of your cheek and shoulder helps maintain the same sight picture from one shot to another.
Practicing this alignment technique improves muscle memory and allows you to develop a repeatable aiming process. Small inconsistencies in head placement or sight positioning can affect where the shot impacts, making proper alignment an important part of accuracy.
Adjust Windage and Elevation Settings
Many shotgun sights include adjustment features that allow you to fine-tune accuracy. Windage adjustments control horizontal movement, helping you correct shots that impact too far left or right. Elevation adjustments control vertical movement, allowing you to raise or lower the point of impact.
Make small adjustments rather than making large changes all at once. After each adjustment, test the sight position and evaluate whether the changes improve alignment. Gradual adjustments provide better control and help you avoid moving too far away from the desired setting.
Understanding how these adjustments work allows you to customize the sight according to your shooting style and preferred distance.
Confirm Alignment Through Testing and Maintenance
After aligning your shotgun sight, testing is necessary to confirm that the setup performs correctly. Use consistent shooting techniques and observe whether your shots are matching your intended point of aim. Additional minor adjustments may be required to achieve the desired results.
Regular inspection is also important because recoil and repeated use can affect sight positioning over time. Checking mounting hardware and confirming alignment before shooting sessions helps maintain reliable performance.
Keeping the sight clean and properly maintained supports long-term accuracy. A well-aligned and properly maintained shotgun sight provides a more consistent aiming experience during different shooting situations.
How to Mount a Red Dot Sight on a Shotgun
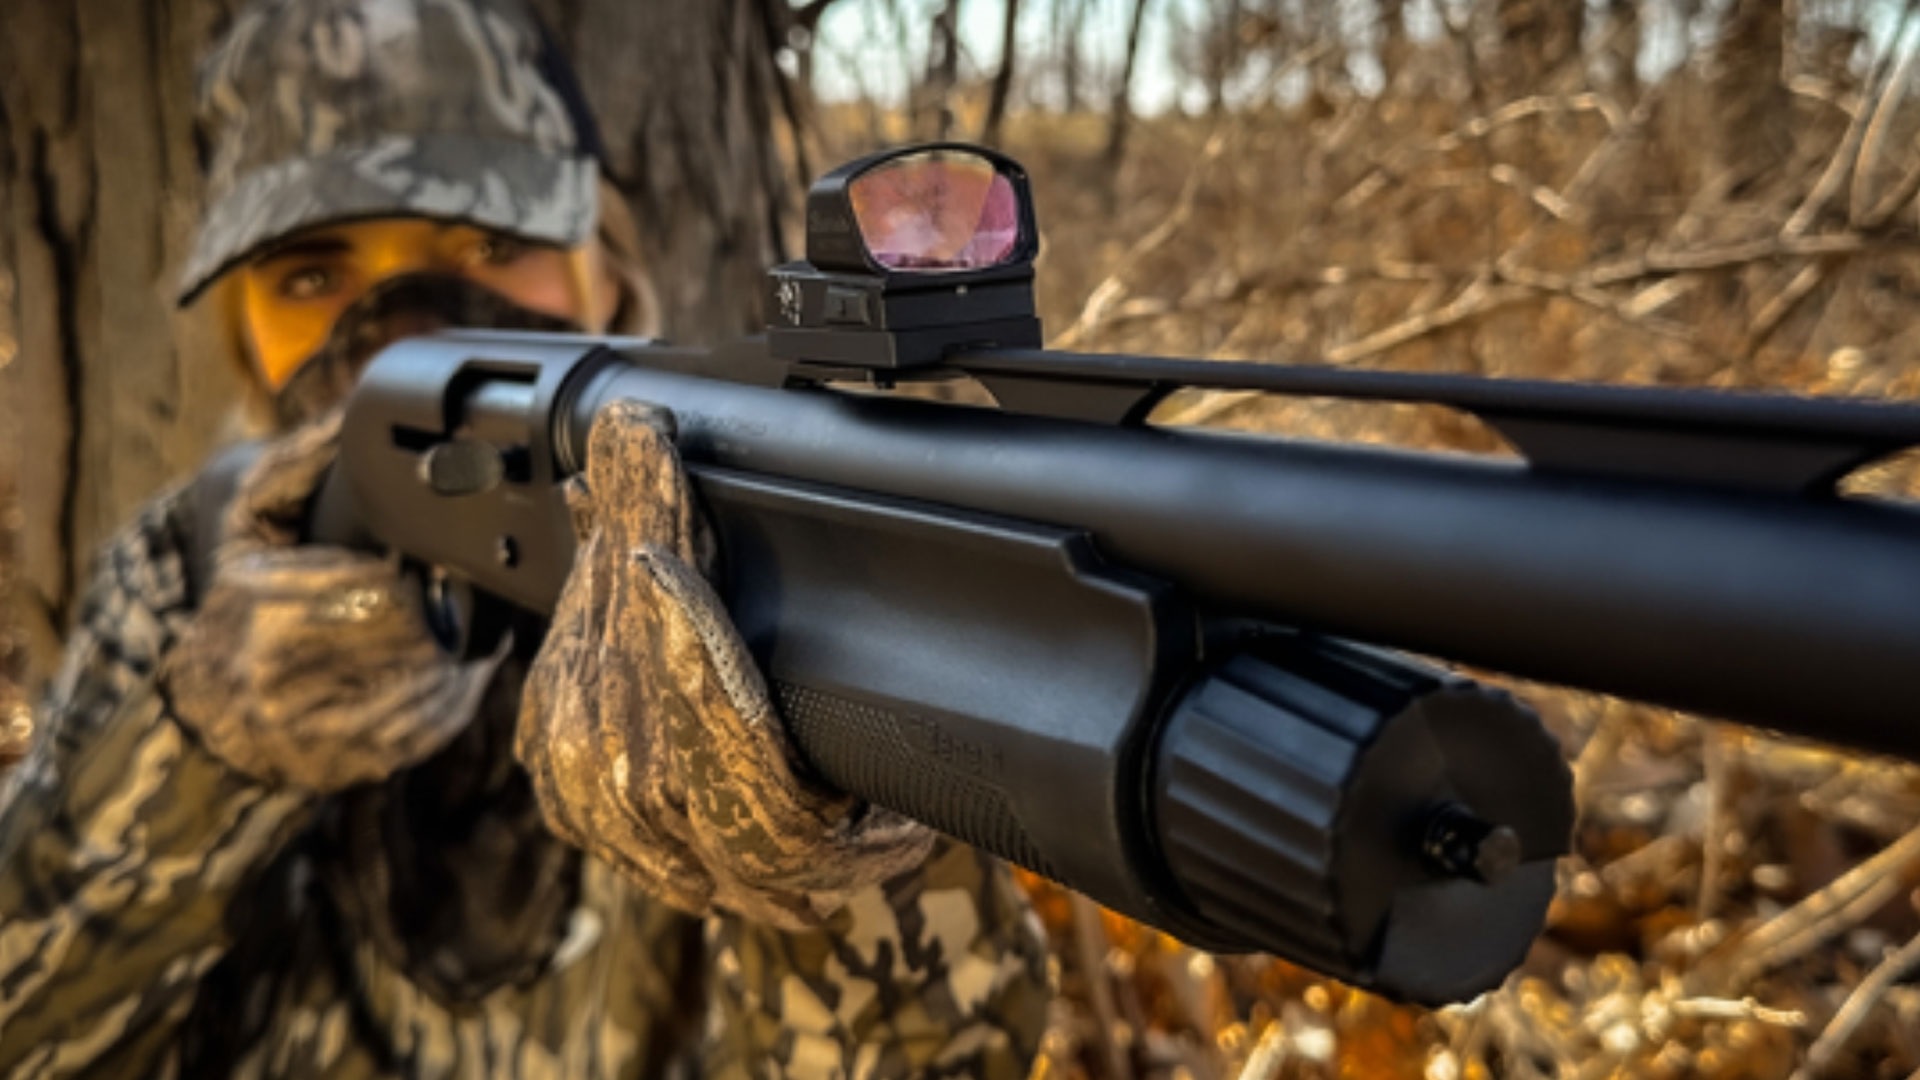
Mounting a red dot sight on a shotgun can improve target acquisition and aiming consistency, especially during fast-paced shooting situations. The installation process requires proper preparation, compatible mounting hardware, and careful adjustment. Understanding each step helps ensure the sight remains secure, maintains alignment, and performs reliably during regular use.
Choose a Compatible Red Dot Sight and Mount
The first step in mounting a red dot sight is selecting a model that works with your specific shotgun. Different shotguns may require different mounting solutions, such as Picatinny rails, receiver mounts, or specialized adapters. Confirming compatibility before installation prevents fitment issues and ensures a stable connection.
You should also consider factors such as durability, battery life, size, and recoil resistance when selecting a red dot sight. Shotguns produce significant recoil, so choosing a sight designed to handle repeated impact is important for maintaining reliability.
A properly matched sight and mount provide a stronger foundation and reduce the chance of movement or alignment problems after installation.
Prepare the Shotgun and Install the Mounting System
Before installing the red dot sight, make sure your shotgun is unloaded and safely prepared for maintenance. Clean the mounting area to remove dirt, oil, and debris that could prevent the mount from sitting securely. A clean surface helps create a stronger connection between the shotgun and sight system.
Attach the mounting rail or adapter according to the manufacturer’s instructions. Tighten the mounting hardware carefully and use the recommended torque settings when available. Over-tightening can damage components, while loose hardware may allow the sight to shift during recoil.
Taking time during this step ensures the mount provides a stable platform for the red dot sight and helps prevent future adjustment issues.
Attach and Secure the Red Dot Sight
Once the mounting system is installed, place the red dot sight onto the rail or adapter and position it according to your shooting preference. Many shooters place the sight where they can quickly acquire the dot while maintaining a comfortable shooting position.
Secure the sight using the included mounting screws and hardware. A torque wrench can help apply consistent pressure and prevent damage to the screws or sight body. After tightening, check that the sight does not move when gentle pressure is applied.
Proper installation creates a reliable connection that allows the red dot sight to maintain alignment during repeated shooting sessions.
Zero and Test the Red Dot Sight
After mounting the red dot sight, the next step is zeroing it to match your shotgun’s point of impact. Start by making initial adjustments and then test the shotgun at your preferred shooting distance. Use controlled shots to determine whether the red dot aligns correctly with where your shots land.
Adjust the windage and elevation settings gradually until the point of aim matches the point of impact. Making small changes helps you achieve better accuracy without overcorrecting.
Regularly inspect the mounting screws and sight alignment after use. Proper maintenance ensures the red dot sight continues to provide consistent performance over time.
People Also Asked
How To Mount Sight On Shotgun?
Mounting a sight on a shotgun requires proper preparation, compatible hardware, and careful installation. You should begin by selecting a sight that matches your shotgun model and intended use. After confirming compatibility, prepare the firearm, clean the mounting area, and attach the sight system according to the manufacturer’s instructions.
You need to ensure all screws are tightened properly and the sight remains stable before use. After installation, adjusting the sight and testing accuracy helps create a reliable setup. Taking time during each step improves alignment and reduces potential issues during shooting.
What Tools Do You Need To Mount A Shotgun Sight?
The tools needed to mount a shotgun sight depend on the type of sight and mounting system you choose. Common tools include screwdrivers, precision bits, a torque wrench, cleaning supplies, and alignment tools. Using the correct tools helps prevent damage to screws, mounts, and sight components during installation.
A torque wrench is especially useful because it allows you to tighten hardware to the recommended specifications. Cleaning supplies also play an important role by removing oil and debris from mounting surfaces. Having all necessary tools ready before starting makes the installation process smoother and more accurate.
Can You Install A Sight On Any Shotgun?
You can install a sight on many shotguns, but compatibility depends on the firearm design and available mounting options. Some shotguns already include rails or mounting points, while others may require aftermarket adapters or modifications to support a sight system.
Before purchasing a sight, you should check your shotgun model and confirm which mounting systems are available. Choosing a compatible setup ensures the sight attaches securely and maintains proper alignment. Installing an incompatible sight may lead to stability problems, poor accuracy, or damage to the firearm components.
How Do You Align A Shotgun Sight After Installation?
After installing a shotgun sight, proper alignment helps ensure accurate aiming and consistent performance. You should first confirm that the sight is mounted securely and positioned correctly. Then, adjust the sight settings according to your shooting distance and preferred point of aim.
Many sights allow adjustments for windage and elevation, helping you correct horizontal and vertical differences. Make small changes during adjustment and test the shotgun after each modification. Regular practice and careful observation help you create a consistent sight picture and improve your overall shooting accuracy.
How Long Does It Take To Mount A Shotgun Sight?
The time required to mount a shotgun sight depends on the type of sight, mounting system, and your experience level. A simple bead sight replacement may take less time, while installing a rail-mounted optic can require more preparation and adjustment.
You should avoid rushing the process because incorrect installation can affect sight stability and accuracy. Taking time to clean the mounting area, secure hardware properly, and check alignment provides better results. A careful installation process usually saves time later by reducing the need for repeated adjustments.
Can You Mount A Red Dot Sight On A Shotgun?
Yes, many shotguns can be equipped with a red dot sight when the proper mounting system is available. Red dot sights are popular because they provide a clear aiming point and allow quick target acquisition. They are commonly used for hunting, sport shooting, and other applications where fast aiming is beneficial.
You need to choose a durable red dot sight designed to handle shotgun recoil. A compatible rail or adapter is also required for secure installation. Proper mounting, tightening, and zeroing help the sight maintain reliable performance during use.
Do You Need To Zero A Shotgun Sight After Mounting?
Yes, you should zero a shotgun sight after installation to ensure the point of aim matches the point of impact. Even a securely mounted sight may require adjustments because every shotgun, ammunition type, and shooting distance can affect performance.
Zeroing involves testing the shotgun and making small windage and elevation adjustments until the sight aligns correctly. You should make gradual changes and confirm accuracy through repeated testing. Regularly checking zero after heavy use helps maintain reliable performance and ensures the sight continues working as expected.
Final Thoughts
Installing the right sight can improve your shooting experience by providing better target focus, consistency, and confidence. Learning how to mount sight on shotgun helps you understand the proper tools, mounting methods, and adjustment steps needed for a secure installation.
Taking time to choose a compatible sight, follow the correct installation process, and check alignment can prevent common issues like loose mounts or inaccurate aiming. Regular inspection and maintenance will also help keep the sight performing properly over time.
Whether you are upgrading for improved accuracy or adding more versatility to your shotgun, knowing how to mount sight on shotgun allows you to make informed decisions. A properly installed and adjusted sight can provide a reliable setup that matches your shooting needs and preferences.