Should Red Dot Align With Front Sight? Complete Guide for Better Accuracy
Getting comfortable with a red dot sight takes more than mounting it on your firearm and heading to the range. Many shooters notice the dot sitting above or around the iron sights and begin wondering whether the setup is actually correct. That question often leads people to ask, should red dot align with front sight when aiming or zeroing a pistol or rifle.
Modern optics are designed to improve target acquisition and shooting speed, but understanding sight alignment still matters. A proper setup helps you build confidence, maintain accuracy, and transition smoothly between iron sights and the optic during practice or defensive use.
For beginners, the relationship between the front sight and the red dot can feel confusing at first. The dot may appear slightly different depending on your shooting position, optic height, or co-witness setup. Small adjustments in presentation can also change how the sights appear together.
Learning how these systems work together makes a big difference in consistency and performance. Once you understand should red dot align with front sight, it becomes much easier to improve accuracy and develop better shooting habits over time.
How a Red Dot Sight Works
A red dot sight uses an illuminated aiming point to help shooters focus on the target instead of lining up traditional iron sights. The optic projects a small red dot onto a specially coated lens, creating a faster and cleaner sight picture. This design improves target acquisition, especially during rapid shooting or defensive situations. Understanding how the system functions helps shooters use the optic more effectively and maintain better accuracy during practice or real-world use.
The Red Dot Is Reflected Through a Special Lens
Inside the optic, a small LED projects light toward a curved and coated glass lens. That coating reflects the red light back to the shooter’s eye while still allowing a clear view of the target. The result is a floating red aiming point that appears directly in front of the shooter. Unlike traditional iron sights, the shooter does not need to focus on multiple points at the same time.
This setup allows quicker target transitions and a more natural shooting experience. The dot remains visible as long as the shooter keeps the optic within their line of sight. Many shooters prefer this system because it reduces eye strain and helps maintain awareness of the surrounding area while aiming.
The Dot Moves With Your Eye Position
One common misunderstanding about red dot sights is assuming the dot stays fixed in the center of the glass. In reality, the dot can move around the viewing window depending on head position and firearm presentation. Modern optics are designed to minimize parallax, allowing the bullet to hit near the intended target even when the dot appears slightly off-center.
This feature makes red dot sights extremely useful for fast-paced shooting situations. Shooters can focus entirely on the target instead of carefully aligning a rear sight and front sight together. Consistent practice still matters because a stable presentation helps the dot appear faster and improves shot placement over time.
Brightness Settings Help in Different Lighting Conditions
Most red dot sights include adjustable brightness controls to improve visibility in changing environments. A brighter setting works better outdoors in direct sunlight, while a lower setting helps indoors or during low-light shooting. Proper brightness adjustment prevents the dot from appearing blurry, oversized, or difficult to track during firing.
Battery-powered optics may also include automatic brightness sensors or motion activation features. These functions help extend battery life while keeping the optic ready for use. Some advanced models even offer multiple reticle styles or green dot options for shooters who prefer a different aiming appearance. Learning how brightness affects visibility can greatly improve shooting comfort and accuracy.
Should Red Dot Align With Front Sight?
Many shooters wonder whether the red dot should sit directly on top of the front sight during aiming. The answer often depends on the firearm setup, optic height, and co-witness configuration. Red dot sights and iron sights can work together, but they are designed for slightly different aiming methods. Understanding how both systems interact helps improve accuracy, target acquisition, and overall shooting confidence.
Co-Witness Setup Changes the Sight Picture
A co-witness setup means the iron sights are visible through the red dot optic window. In an absolute co-witness, the red dot appears directly aligned with the front sight when the iron sights are properly lined up. Lower one-third co-witness setups place the iron sights slightly lower in the optic window, creating a less cluttered view while still providing backup aiming support.
Many shooters prefer lower one-third configurations because they allow faster target focus without the iron sights blocking the center of the glass. The red dot does not always need to sit perfectly on the front sight during normal shooting. The optic is designed to function independently, while the iron sights remain available as a backup system.
The Red Dot Is Designed for Target Focus
Traditional iron sights require shooters to focus mainly on the front sight while keeping the target slightly blurred. Red dot optics work differently by allowing the shooter to keep both eyes open and focus directly on the target. The illuminated dot becomes the aiming reference instead of the front sight post.
This difference is why many experienced shooters avoid constantly checking iron sight alignment while using a red dot. Once the optic is properly zeroed, the shooter simply places the dot on the target and fires. Trying to align the front sight every time can slow down shooting speed and reduce the main advantage of using a red dot sight in the first place.
Proper Zero Matters More Than Perfect Alignment
The most important factor is making sure the optic is correctly zeroed for the intended shooting distance. A properly zeroed red dot will maintain accuracy regardless of whether the front sight appears perfectly centered under the dot. Small differences in head position or presentation may slightly change the visual relationship between the two sights.
Shooters often notice the red dot floating above or near the front sight during dry fire or live practice. This is completely normal in many setups. Consistent grip, presentation, and practice help the dot appear naturally within the optic window. Over time, shooters develop muscle memory that allows faster sight acquisition without needing to consciously line up the front sight and red dot together every shot.
How to Properly Use a Red Dot Sight
Using a red dot sight correctly takes practice, consistency, and a clear understanding of how the optic functions during shooting. Many new shooters expect instant accuracy after mounting the optic, but proper technique plays a major role in performance. A red dot sight is designed to improve speed and target focus, though developing good habits helps you get the best results from the system.
Focus on the Target Instead of the Dot
One of the biggest advantages of a red dot sight is the ability to keep your eyes focused on the target. Unlike traditional iron sights, where your attention shifts to the front sight post, a red dot allows you to maintain a clear view of the target while using the illuminated dot as the aiming reference. This creates faster target acquisition and smoother transitions between multiple targets.
Many beginners make the mistake of staring directly at the dot. That often causes slower reactions and inconsistent aiming. The dot should appear naturally within your field of view while your attention stays locked on the target area. With regular practice, this method becomes more natural and helps improve both speed and accuracy during shooting sessions.
Build a Consistent Presentation
A red dot sight works best when the firearm is presented consistently every time. Proper grip, stance, and arm extension help the optic line up naturally with your eye. When the presentation is inconsistent, shooters often waste time searching for the dot inside the optic window. Repetition and dry-fire practice help develop muscle memory that brings the dot into view quickly.
Many experienced shooters practice drawing or raising the firearm slowly while maintaining the same head position and grip pressure. Small changes in wrist angle or posture can affect how quickly the dot appears. Consistency reduces unnecessary movement and creates a smoother shooting experience, especially during rapid target engagement or defensive drills.
Adjust Brightness and Zero Correctly
Correct brightness settings make a major difference in optic performance. A dot that is too bright may appear blurry or oversized, while a dim setting can become difficult to see in bright outdoor conditions. Adjusting brightness based on the environment helps maintain a clean and visible aiming point throughout the shooting session.
Proper zeroing is equally important for accuracy. The optic should be sighted in at a suitable distance depending on the firearm and intended use. Once zeroed correctly, the shooter can trust the dot placement without constantly checking iron sight alignment. Regular range testing and small adjustments help maintain reliability and ensure the optic continues performing as expected over time.
Types of Red Dot and Front Sight Configurations
Red dot optics can be paired with iron sights in several different ways depending on the firearm setup and shooting preference. The position of the optic, sight height, and mounting system all affect how the front sight appears through the optic window. Understanding the most common configurations helps shooters choose a setup that balances speed, visibility, and backup sight accessibility during training or defensive use.
Absolute Co-Witness Configuration
An absolute co-witness setup places the red dot optic at the same height as the iron sights. When the shooter aligns the front and rear sights correctly, the red dot appears directly on top of the front sight post in the center of the optic window. This setup is popular among shooters who want a familiar sight picture and easy transition between the optic and iron sights.
Many rifle owners prefer absolute co-witness because it allows them to confirm zero more easily during practice sessions. The iron sights remain fully usable through the optic without changing head position. Some shooters feel this arrangement creates a slightly cluttered viewing area because the sights stay centered in the optic window at all times. Despite that, it remains one of the most trusted configurations for defensive rifles and training carbines.
Lower One-Third Co-Witness Setup
A lower one-third co-witness places the optic slightly higher than the iron sights. In this configuration, the front and rear sights appear in the lower portion of the optic window instead of directly in the center. The red dot stays above the iron sights during normal aiming, giving shooters a cleaner and less obstructed field of view.
This setup is extremely popular among experienced shooters because it combines speed with reliable backup sight access. The shooter can use the red dot normally without the iron sights distracting from the target picture. When necessary, lowering the head position slightly brings the iron sights into alignment for emergency use. Many tactical and competitive shooters choose this setup because it improves visibility and supports faster target transitions during dynamic shooting situations.
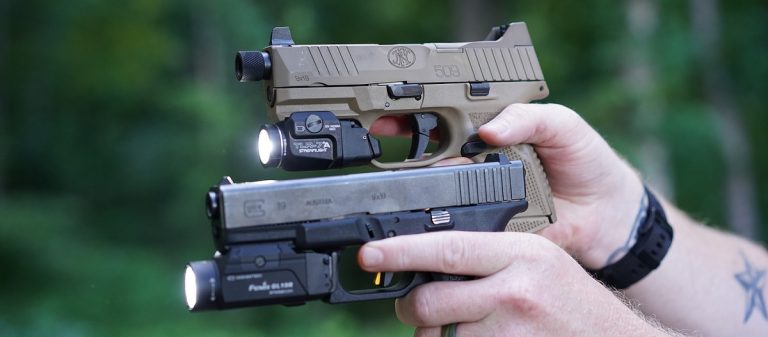
Suppressor-Height Sight Configuration
Suppressor-height sights are taller iron sights designed to work with optics mounted on pistols. Standard handgun sights are often too low to appear through the optic window, especially when using slide-mounted red dot systems. Taller sights solve this issue by extending high enough to provide a usable co-witness picture alongside the optic.
Many concealed carry and duty pistols use suppressor-height sights as backup aiming systems. These sights remain functional when the optic battery fails or the lens becomes blocked by dirt, rain, or debris. Some shooters prefer a lower co-witness with pistol optics because it keeps the iron sights from occupying too much of the viewing window. Proper sight height selection helps create a balanced setup that maintains visibility without interfering with the optic’s main purpose.
Offset and Offset-Style Configurations
Some rifle setups use offset iron sights or offset optics alongside a primary red dot or magnified optic. Offset systems are mounted at a slight angle, allowing shooters to switch sighting systems by rotating the firearm slightly. This arrangement is common in competitive shooting, tactical training, and rifles designed for multiple engagement distances.
Offset configurations provide flexibility in fast-paced shooting environments. A shooter might use a magnified optic for longer distances while keeping offset iron sights or a secondary red dot ready for close-range targets. These systems require additional training because transitioning between sighting systems changes the firearm’s handling and shooting position. Even so, many advanced shooters appreciate the adaptability and speed offered by properly configured offset setups.
Common Problems With Red Dot Alignment
Red dot sights are designed to improve speed and accuracy, but alignment issues can still create frustration for many shooters. Problems often appear during the first few range sessions when shooters are learning how the optic interacts with iron sights and firearm presentation. Small setup mistakes, inconsistent grip, or improper zeroing can all affect performance and make the red dot feel difficult to use effectively.
Difficulty Finding the Dot Quickly
One of the most common issues new shooters experience is struggling to locate the red dot when raising the firearm. Instead of seeing the dot immediately, the optic window may appear empty or require unnecessary head movement to find the aiming point. This problem usually comes from inconsistent presentation and improper grip angle rather than a problem with the optic itself.
Dry-fire practice often helps correct this issue by building muscle memory and improving firearm alignment. Shooters who repeatedly present the firearm from the same position tend to see the dot appear naturally within the optic window. Over time, consistent practice reduces hesitation and creates faster target acquisition during live shooting or defensive drills.
Incorrect Co-Witness Expectations
Many shooters expect the red dot to perfectly align with the front sight at all times. This misunderstanding can lead to confusion when the dot appears slightly above, below, or beside the front sight during normal aiming. Different mounting heights and co-witness configurations change how the sights appear through the optic window.
A lower one-third co-witness setup naturally places the iron sights lower in the optic view, while an absolute co-witness keeps them centered. Both configurations function properly when zeroed correctly. Focusing too heavily on sight alignment instead of target focus can slow down shooting speed and reduce the advantages that red dot optics are designed to provide.
Brightness and Zeroing Problems
Improper brightness settings can make the red dot appear distorted or difficult to use. A brightness level that is too high may cause the dot to bloom or look oversized, especially indoors or in low-light conditions. Settings that are too dim can make the dot disappear against bright backgrounds or direct sunlight.
Zeroing problems also create major alignment frustrations. A poorly zeroed optic may cause shots to land far from the intended target, leading shooters to question the sight setup or iron sight position. Regular range testing and small adjustments help maintain accuracy and ensure the optic performs consistently. Proper mounting and routine checks are important because loose screws or shifting mounts can gradually affect alignment during repeated firing.
How to Zero a Red Dot Correctly
Zeroing a red dot sight is one of the most important steps in achieving reliable accuracy. A properly zeroed optic ensures the point of aim matches the point of impact at a chosen distance. Many shooters experience inconsistent shots simply because the optic was never adjusted correctly. Taking time to zero the sight properly improves confidence, precision, and overall shooting performance during practice or defensive use.
Start With a Stable Shooting Position
A stable shooting position makes the zeroing process much more accurate and consistent. Many shooters use a bench rest, sandbags, or shooting support to reduce unnecessary movement while firing groups. Stability helps identify where the firearm is actually impacting instead of confusing shooter movement with sight adjustment problems.
Beginning at a shorter distance, such as 10 or 15 yards for pistols, can make initial adjustments easier. Rifle shooters may start at 25 yards before refining the zero farther out. Firing controlled groups instead of single random shots provides a clearer understanding of the optic’s current alignment. Consistency during the early stages of zeroing saves time and prevents unnecessary adjustment errors later in the process.
Adjust Windage and Elevation Carefully
Most red dot sights include windage and elevation adjustment turrets that move the point of impact horizontally and vertically. Small adjustments are usually measured in clicks, with each click representing a specific movement distance at a certain range. Reading the optic manual helps shooters understand exactly how much each adjustment changes shot placement.
After firing a group, adjustments should be made slowly and methodically instead of turning the turrets excessively. Large corrections often create confusion and make it harder to track progress. Firing another group after each adjustment confirms whether the changes improved alignment. Careful adjustments lead to a more accurate and repeatable zero that remains reliable over time.
Confirm the Zero at Your Intended Distance
Once the optic appears accurate at close range, the zero should be confirmed at the distance most commonly used for shooting. Different firearms and shooting purposes may require different zero distances. Defensive pistols, competition rifles, and hunting setups often benefit from different approaches based on expected engagement ranges.
Shooters should also verify the zero from realistic shooting positions instead of relying only on bench-rested shots. Standing, kneeling, or moving drills help confirm the optic performs consistently under normal conditions. Regularly checking the zero after heavy use, travel, or optic adjustments helps maintain dependable accuracy and ensures the sight remains properly aligned during future shooting sessions.
Benefits of Using a Red Dot Sight
Red dot sights have become extremely popular among shooters because they offer faster aiming, improved target focus, and a more modern shooting experience. These optics are commonly used on pistols, rifles, and shotguns for recreational shooting, competition, hunting, and defensive purposes. Learning the main advantages of a red dot sight helps shooters understand why many firearm owners choose optics over traditional iron sights.
Faster Target Acquisition
One of the biggest benefits of a red dot sight is the ability to acquire targets much faster than with standard iron sights. Traditional sights require shooters to align the rear sight, front sight, and target at the same time. A red dot simplifies this process by allowing the shooter to focus directly on the target while placing the illuminated dot where the shot should land.
This design helps reduce reaction time and improves shooting speed during rapid drills or moving target situations. Many shooters notice quicker follow-up shots because the eye naturally tracks the dot during recoil. Faster sight acquisition can also improve confidence for beginners who may struggle with traditional sight alignment during early training sessions.
Improved Accuracy and Target Focus
Red dot optics help shooters maintain a clearer focus on the target instead of shifting attention between multiple sight points. This improves accuracy, especially at medium distances or during fast-paced shooting scenarios. The single aiming reference reduces visual confusion and creates a cleaner sight picture during firing.
Many shooters experience tighter shot groups after switching to a properly zeroed red dot sight. The optic can also help shooters with aging eyesight or difficulty focusing on iron sights. Since the target remains the primary focus, shooters often feel more comfortable tracking movement and maintaining awareness of the surrounding environment while aiming.
Better Performance in Low-Light Conditions
Most red dot sights include adjustable brightness settings that improve visibility in different lighting environments. The illuminated aiming point remains easier to see in dim conditions compared to traditional black iron sights. This advantage becomes especially useful during indoor shooting, evening practice, or defensive situations with limited lighting.
Some optics also include automatic brightness adjustment features that respond to surrounding light conditions. A properly adjusted dot helps shooters maintain accuracy without straining their eyes or losing sight visibility. Combined with weapon-mounted lights or night sights, red dot optics can create a highly effective setup for low-light shooting applications.
Easier Learning Curve for New Shooters
Many beginners find red dot sights easier to learn than traditional iron sight systems. The simple aiming method allows new shooters to focus on grip, trigger control, and target tracking without becoming overwhelmed by complex sight alignment. This often leads to faster improvement during early range sessions.
The ability to shoot with both eyes open also creates a more natural experience and improves situational awareness. New shooters often develop confidence more quickly when they can clearly see the target and aiming point together. With regular practice, red dot optics help build consistent shooting habits while reducing frustration commonly associated with learning traditional sight systems.
FAQs
Should Red Dot Align With Front Sight?
When you first start using a red dot optic, you may wonder if the dot should line up exactly with the front sight. In most cases, the red dot does not need perfect alignment with the front sight like traditional iron sights do. Instead, you should place the dot directly on the target and focus on the target itself. The optic is designed to work independently from your iron sights during normal shooting.
You may still notice the front sight in the optic window, especially with co-witness setups. That is completely normal and can help as a backup aiming reference. However, your main focus should remain on the red dot and the target rather than trying to center the front sight under the dot every time you shoot.
What Is Co-Witness In A Red Dot Setup?
Co-witness means your iron sights can be seen through the red dot optic window. This setup allows you to use your iron sights if the optic fails or the battery dies. You may choose between absolute co-witness, where the dot sits directly above the front sight, or lower one-third co-witness, where the sights stay lower in the viewing window.
Many shooters prefer lower one-third co-witness because it keeps the optic window less cluttered while still providing backup sight access. If you use a handgun or rifle for defensive shooting, co-witnessing can improve confidence and reliability. It also helps you confirm that your optic and iron sights are properly zeroed together.
Should You Focus On The Front Sight Or The Red Dot?
When using traditional iron sights, you normally focus on the front sight while keeping the target slightly blurry. A red dot sight works differently because you should focus directly on the target instead of the front sight. The red dot simply appears on the target, allowing faster aiming and easier tracking during movement.
If you continue focusing on the front sight while using a red dot, you may slow down your shooting speed and lose some benefits of the optic. With practice, you will learn to keep both eyes open and place the dot naturally on the target. This method improves awareness, target acquisition, and overall shooting performance in different conditions.
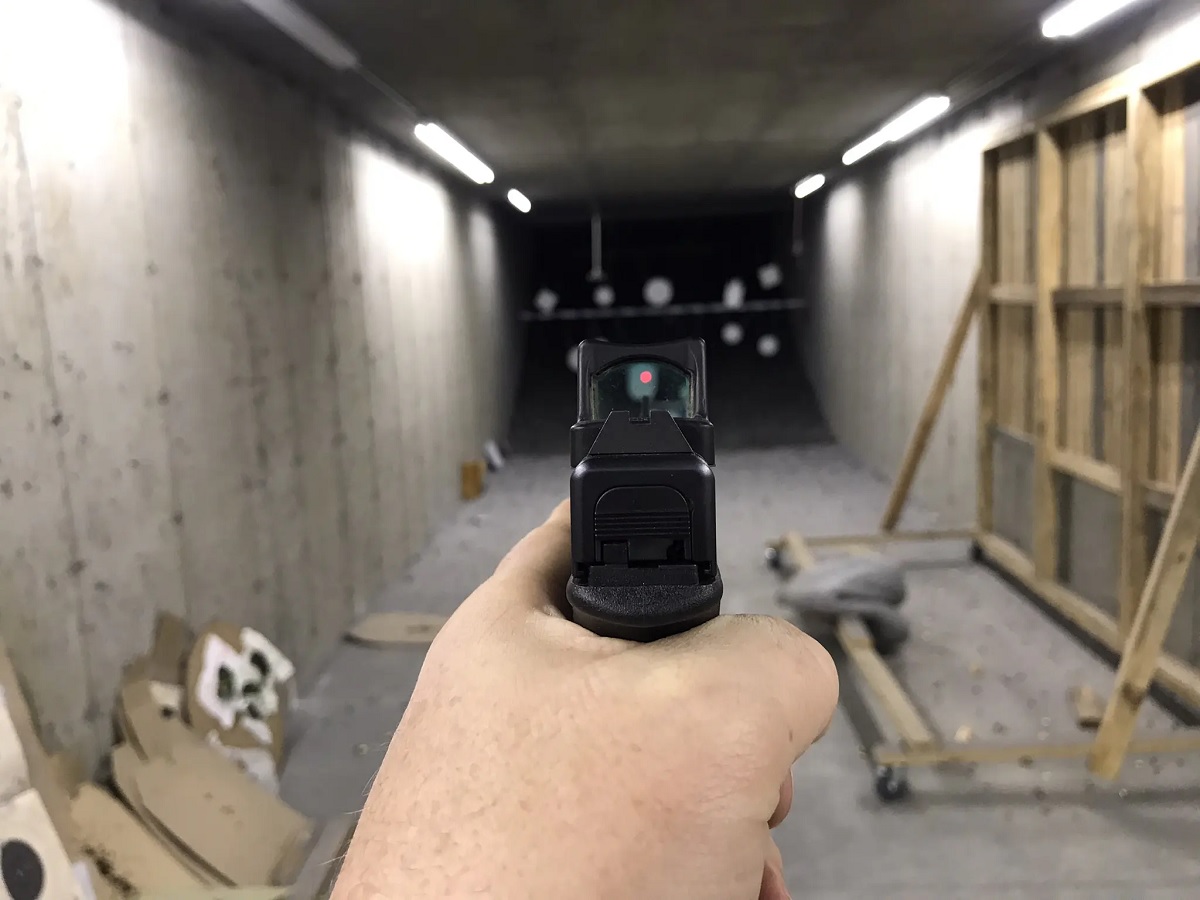
Why Does My Red Dot Look Misaligned With My Front Sight?
You may notice that the red dot sometimes appears slightly above, below, or beside the front sight. This can happen because of your eye position, optic height, or mounting system. It does not always mean something is wrong with your setup. The most important factor is whether your optic is properly zeroed for accurate shooting.
If your shots consistently hit the target where the dot is placed, minor visual misalignment is usually not a problem. You should also check if your firearm uses an absolute or lower one-third co-witness arrangement because both setups position the sights differently inside the optic window. Regular practice helps you become comfortable with your specific sight picture.
Can You Use A Red Dot Without Iron Sights?
Yes, you can use a red dot sight without iron sights if you prefer a cleaner optic window and a lighter setup. Many shooters rely entirely on the optic because modern red dots are durable and dependable. This approach is common for competition shooting, range training, and some defensive firearms where speed is the main priority.
However, backup iron sights still provide extra security if your optic battery fails or the glass becomes damaged. Some shooters feel more confident having a secondary aiming option available during emergencies. Whether you choose to keep iron sights or remove them depends on your shooting style, firearm purpose, and personal comfort with red dot technology.
How Do You Properly Zero A Red Dot With Front Sights?
To zero a red dot correctly, you should start by mounting the optic securely and adjusting the brightness to a comfortable level. Then, shoot a group at your chosen distance and adjust the windage and elevation until the shots land where the dot is placed. Many shooters use distances between 15 and 50 yards depending on firearm type and intended use.
Your front sights can help provide an initial reference during the setup process, especially with co-witness systems. However, the final zero should always be confirmed through live-fire testing rather than visual alignment alone. After zeroing, continue practicing from different positions and distances to ensure the optic remains accurate and reliable under real shooting conditions.
Are Red Dot Sights Better Than Iron Sights?
Red dot sights offer several advantages over traditional iron sights, especially for speed and target tracking. You can aim faster, keep both eyes open, and maintain focus on the target rather than the front sight. This makes red dots popular for self-defense, competitive shooting, hunting, and tactical use across different firearm platforms.
Iron sights still remain valuable because they are simple, reliable, and do not require batteries. Some shooters also prefer them for close-range shooting or backup use. The better option depends on your experience level, shooting goals, and firearm setup. Many people combine both systems together to enjoy the speed of a red dot while keeping the dependability of iron sights available.
Final Thoughts
Understanding the relationship between a red dot sight and iron sights can greatly improve your shooting confidence and overall accuracy. Many shooters spend time trying to line everything up perfectly, but the most important factor is having a properly zeroed optic and a consistent shooting presentation.
The answer to Should Red Dot Align With Front Sight often depends on the type of co-witness setup and personal shooting preference. Some configurations place the dot directly over the front sight, while others keep the iron sights lower in the optic window for a cleaner sight picture.
With regular practice, shooters learn to trust the red dot and focus more on the target rather than constantly checking sight alignment. Once you fully understand Should Red Dot Align With Front Sight, using a red dot optic becomes faster, smoother, and far more effective during both practice and real-world shooting situations.